How many hours a day do you spend sitting?
Think about it. You sit for breakfast, you sit during your commute, you sit at work, you sit while checking your phone, you sit for lunch, then you probably sit again to relax after work. Before you know it, most of your day you spend sitting.
Your body was built to move.
This is where Standing Yoga Poses can offer a positive change. It helps you get out of the chair and brings your awareness back to your feet, legs, spine, breath and balance. You learn how your whole body works together as you stand, stretch, twist, bend and balance.
You know what’s amazing? You don't have to be flexible or experienced to start. All you need is a little space, something steady to stand on, and the willingness to focus.
One thing I’ve noticed with beginners is that they often worry about flexibility before they even begin. In reality, learning to notice your body is far more useful than trying to look flexible.
What Are Standing Yoga Poses?
Standing Yoga Poses Are More Than Asanas on Your Feet. They teach you how to build stability from the bottom up.
Your feet are the base, and your legs, hips, spine and gaze all work together to create a stable posture. Even when the body appears to be still, tiny adjustments are taking place all the time: shifting weight, balancing, lengthening, releasing unnecessary tension.
15 Best Standing Yoga Poses With Names
| | Standing Yoga Pose | Sanskrit Name | Main Focus |
| 1 | Mountain Pose | Tadasana | Alignment & awareness |
| 2 | Upward Bound Pose | Urdhva Hastasana | Full-body stretch |
| 3 | Triangle Pose | Trikonasana | Mobility & stability |
| 4 | Revolved Triangle | Parivrtta Trikonasana | Balance & mobility |
| 5 | Standing Forward Bend | Uttanasana | Hamstring stretch |
| 6 | Tree Pose | Vrikshasana | Balance |
| 7 | Half Lotus Tree Pose | Ardha Padmasana Vrikshasana | Balance & hip mobility |
| 8 | Eagle Pose | Garudasana | Coordination & stability |
| 9 | Balancing Stick Pose | Tuladandasana | Strength & balance |
| 10 | Warrior I | Virabhadrasana I | Leg strength |
| 11 | Warrior II | Virabhadrasana II | Stability & endurance |
| 12 | Half Moon Pose | Ardha Chandrasana | Balance & coordination |
| 13 | Extended Side Angle | Utthita Parsvakonasana | Hip & side-body mobility |
| 14 | Pyramid Pose | Parsvottanasana | Hamstring mobility |
| 15 | Chair Pose | Utkatasana | Leg & core strength |
Standing is something we do on a daily basis. Yoga just asks us to do it with more awareness. These standing yoga poses take the basic poses and turn them into an exercise in alignment, movement and balance. Begin where you are, and let each posture turn into new lessons.
1. Mountain Pose (Tadasana)
Stand with your feet together or hip distance apart. Widen your toes and press your feet evenly into the floor. Bend your knees, extend your spine and relax your arms alongside your body.
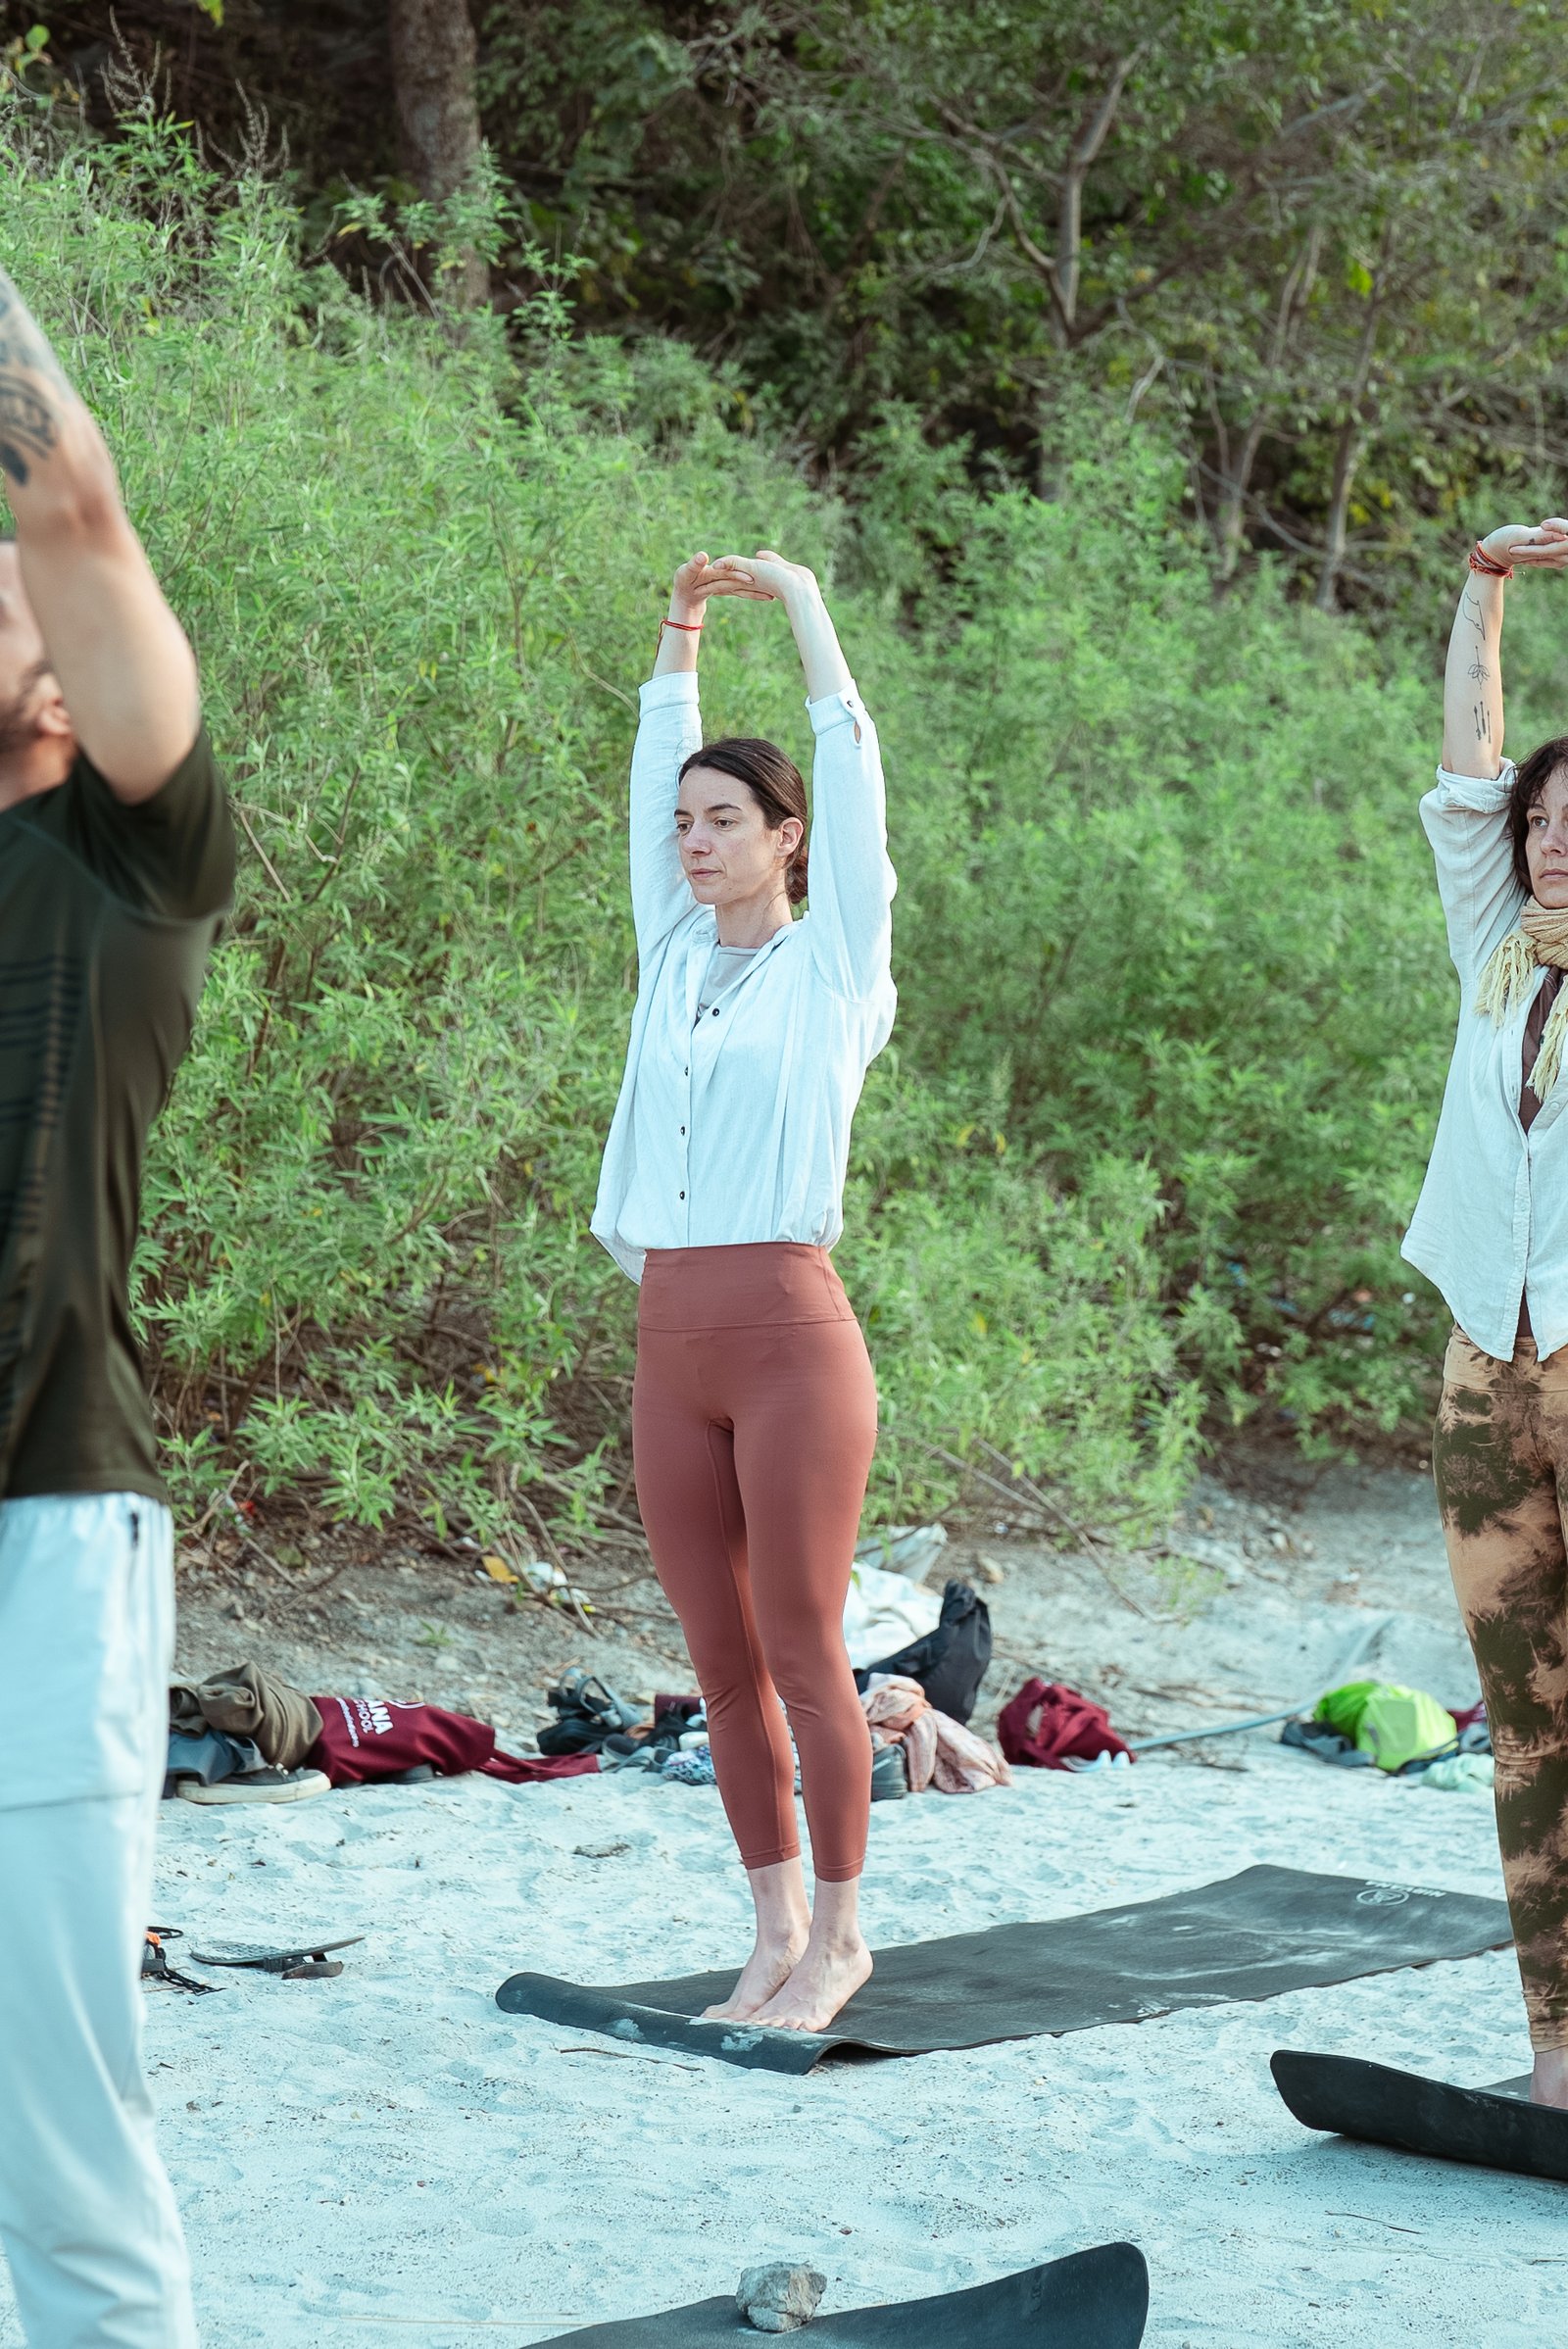
This can help: Imagine a straight line from your feet to the top of your head.
Benefits:
- It strengthens the legs and ankles.
- Great for balance and body awareness
- Helps activate the muscles needed to stand stable
Beginner Tip: Not comfortable with feet touching? Keep your feet hip-width apart.
Modification/Precaution: Keep your knees slightly bent if you feel discomfort in them.
2. Upward Bound Pose (Urdhva Hastasana)
From Mountain Pose, inhale and gently raise both arms overhead. Reach out with your fingertips. Keep your shoulders relaxed.
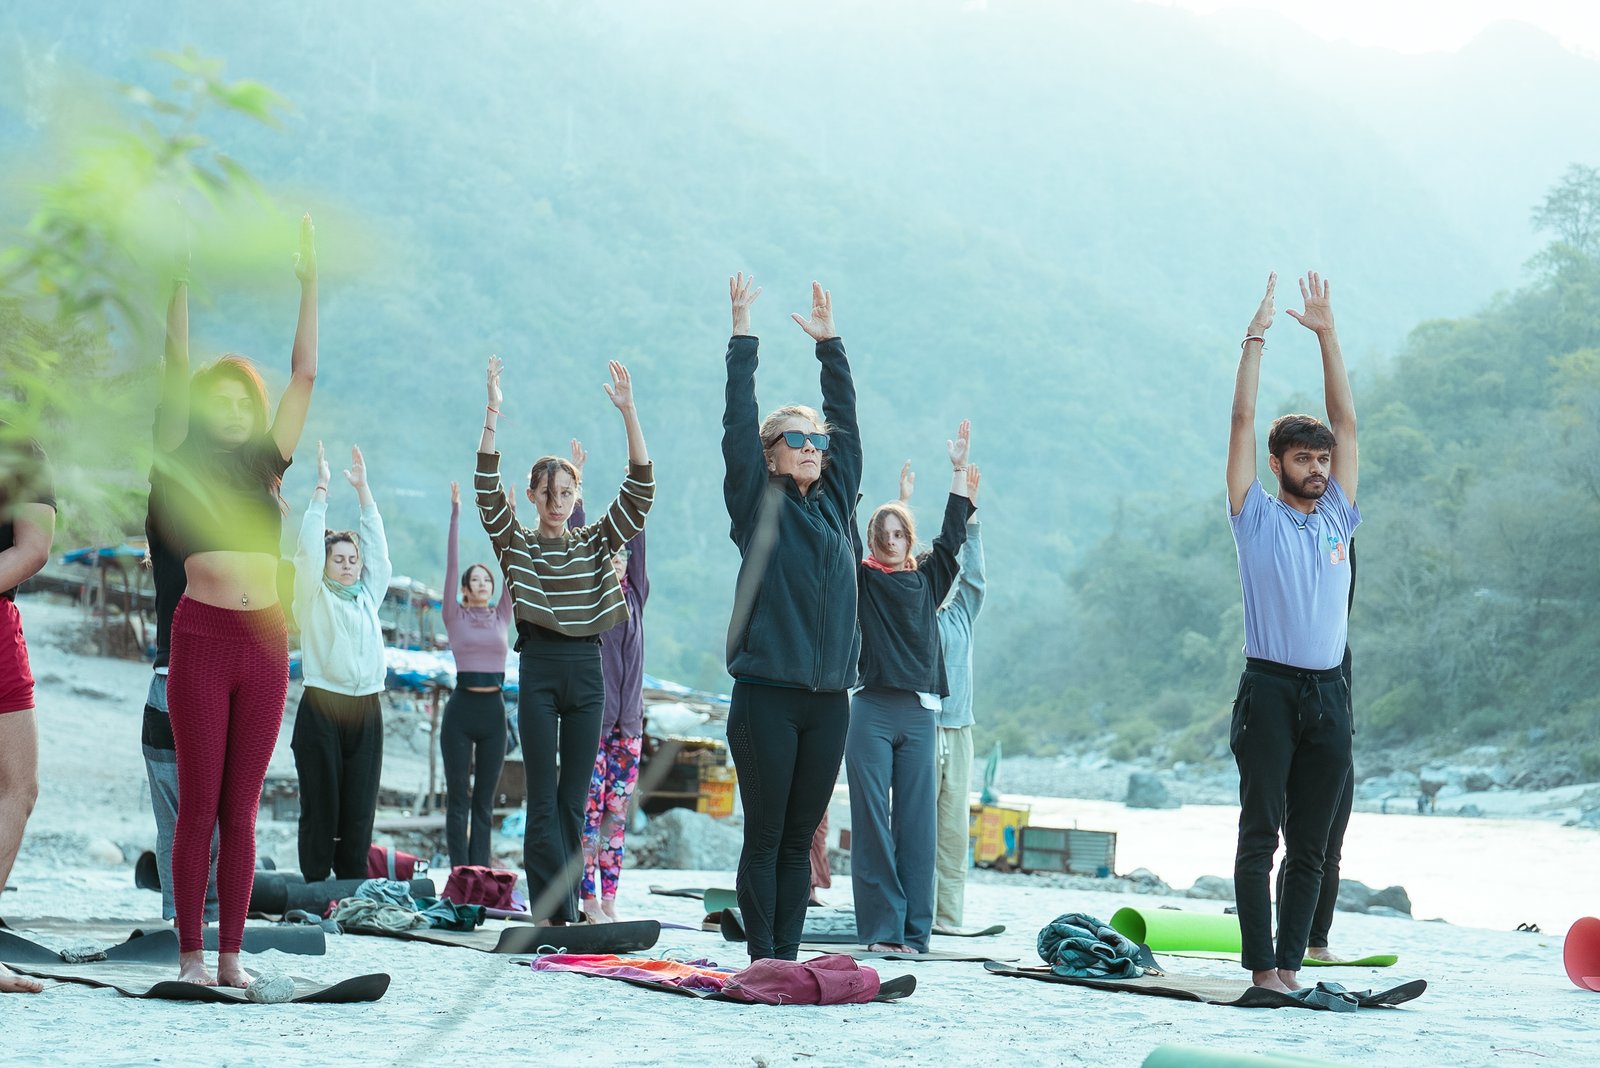
This can help: Grow up without pushing out your ribs.
Benefits:
- Extends the shoulders, arms and sides of the body.
- Enhances shoulder flexibility.
- Builds up muscles supporting the upper body.
Tip for beginners: If you have tight shoulders, keep your arms a little apart.
Modification/Precaution: If you feel discomfort in your shoulders, lower your arms.
3. Triangle Pose (Trikonasana)
Stand with your feet wide. Turn out your right foot and turn your left foot in slightly. Extend both arms, reach your right hand forward, then down to your shin or ankle. Reach your left arm upward.
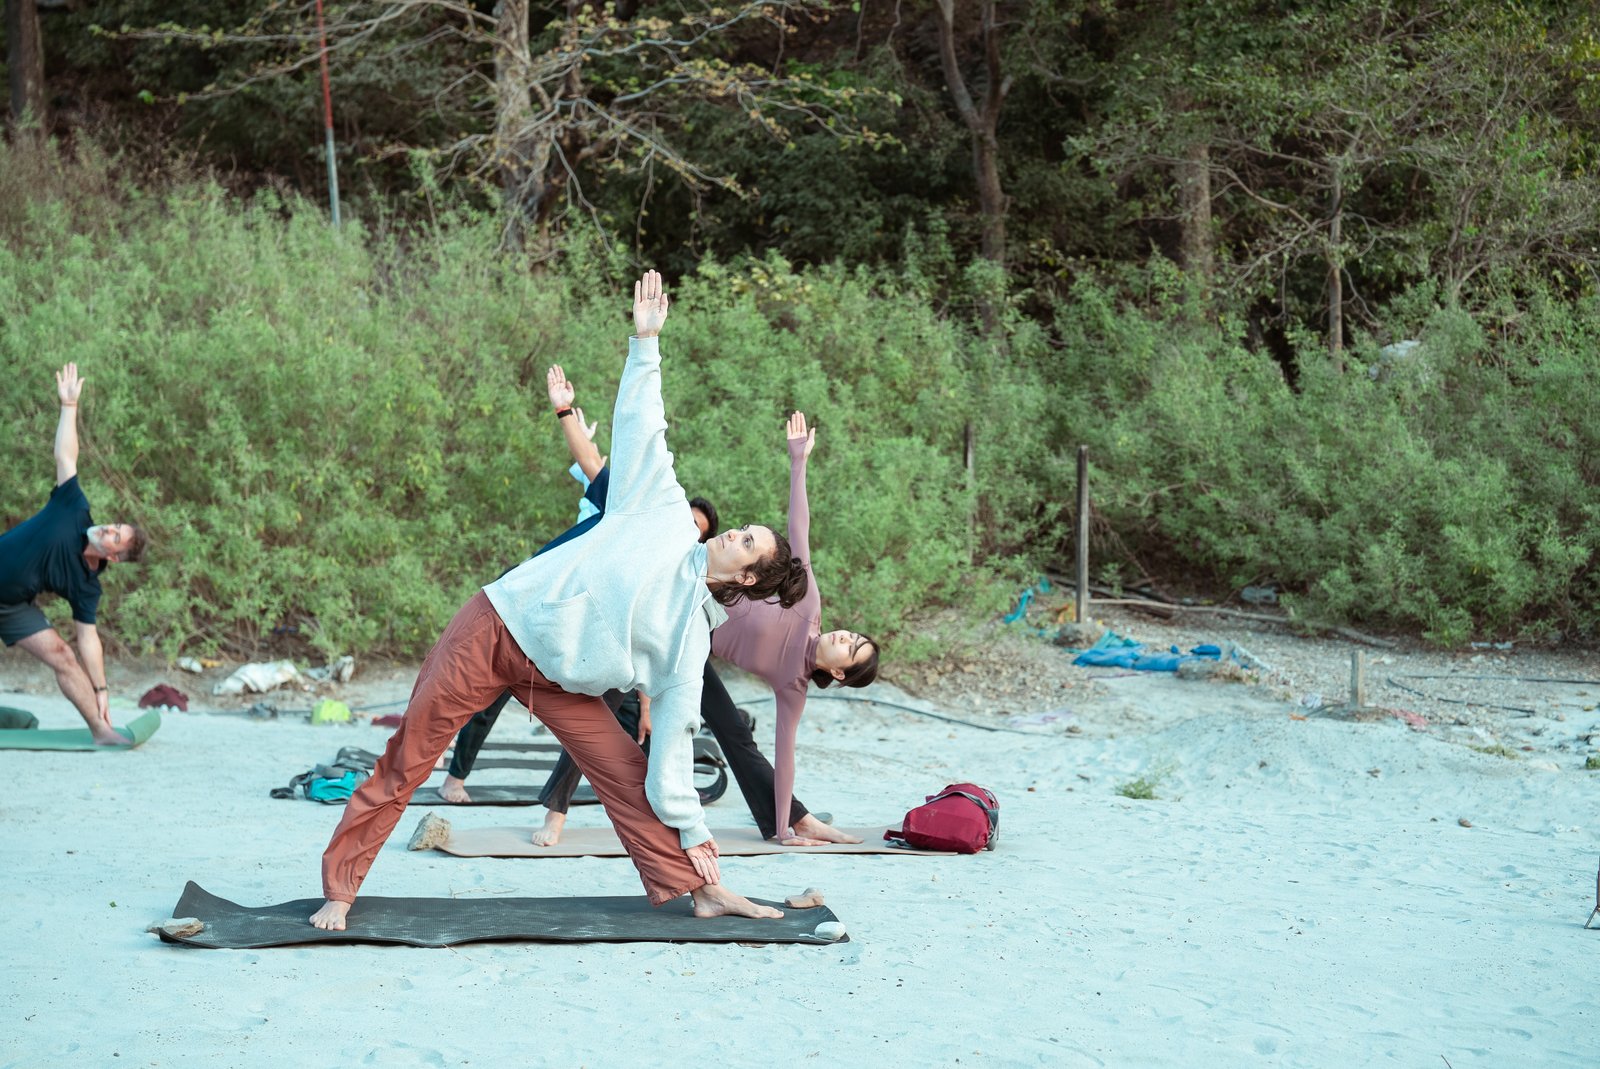
This can help: Maintain the length on both sides of your waist; don't fall toward the floor.
Benefits:
- Strengthens the leg muscles.
- Makes your hips and the backs of your legs more flexible.
- Stretches the waist and sides of the body.
Beginner tip: If you can’t reach your shin, use a block.
Modification/Precaution: Don’t push your hand down to the floor.
4. Revolved Triangle Pose (Parivrtta Trikonasana)
Step out one foot and back the other. Keep both legs on the ground and elongate your spine. Bring the opposite hand to the outside of your front foot and rotate your chest to the side.
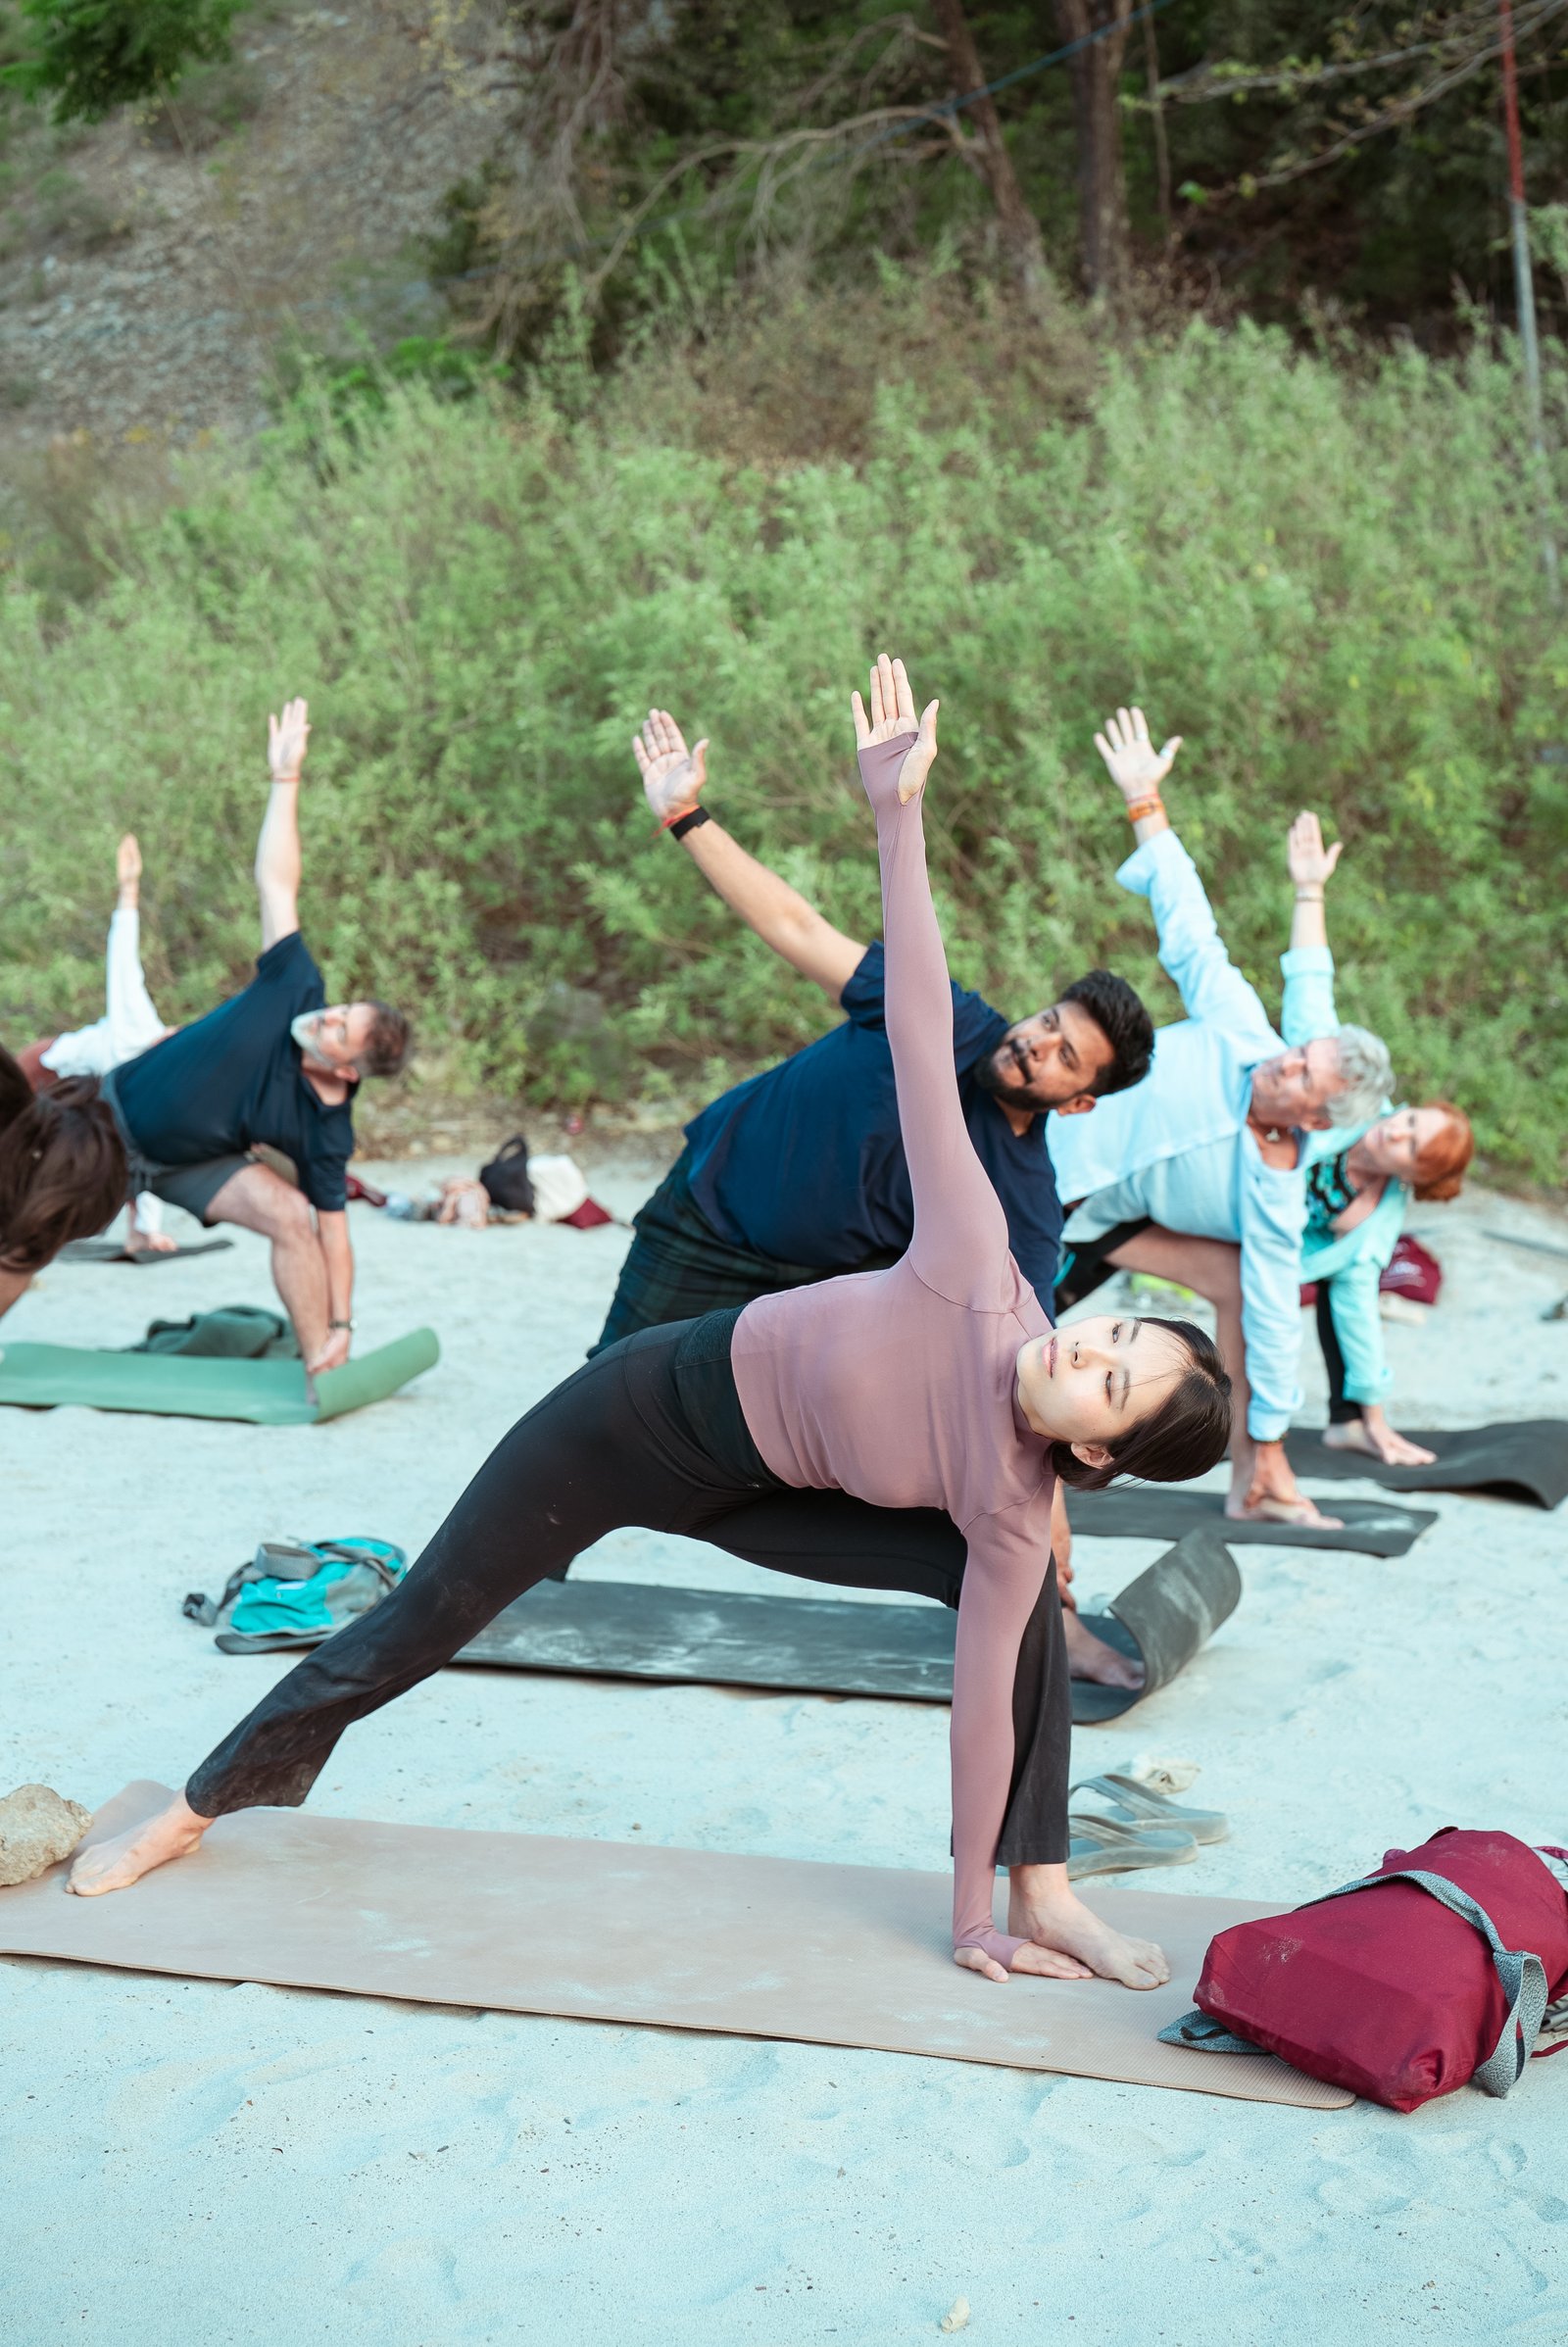
This can help: Make space in your spine before you twist.
Benefits:
- Enhances flexibility in the hips and back of legs.
- Strengthens the legs and improves balance.
- Improves controlled movement of the spine.
Beginner tip: For more stability, press your hand down on a block.
Modification/Precaution: Twist gently; don’t force your spine.
5. Standing Forward Bend (Uttanasana)
Stand tall, bend forward from your hips with your knees slightly bent. Let your head and arms relax toward the floor.
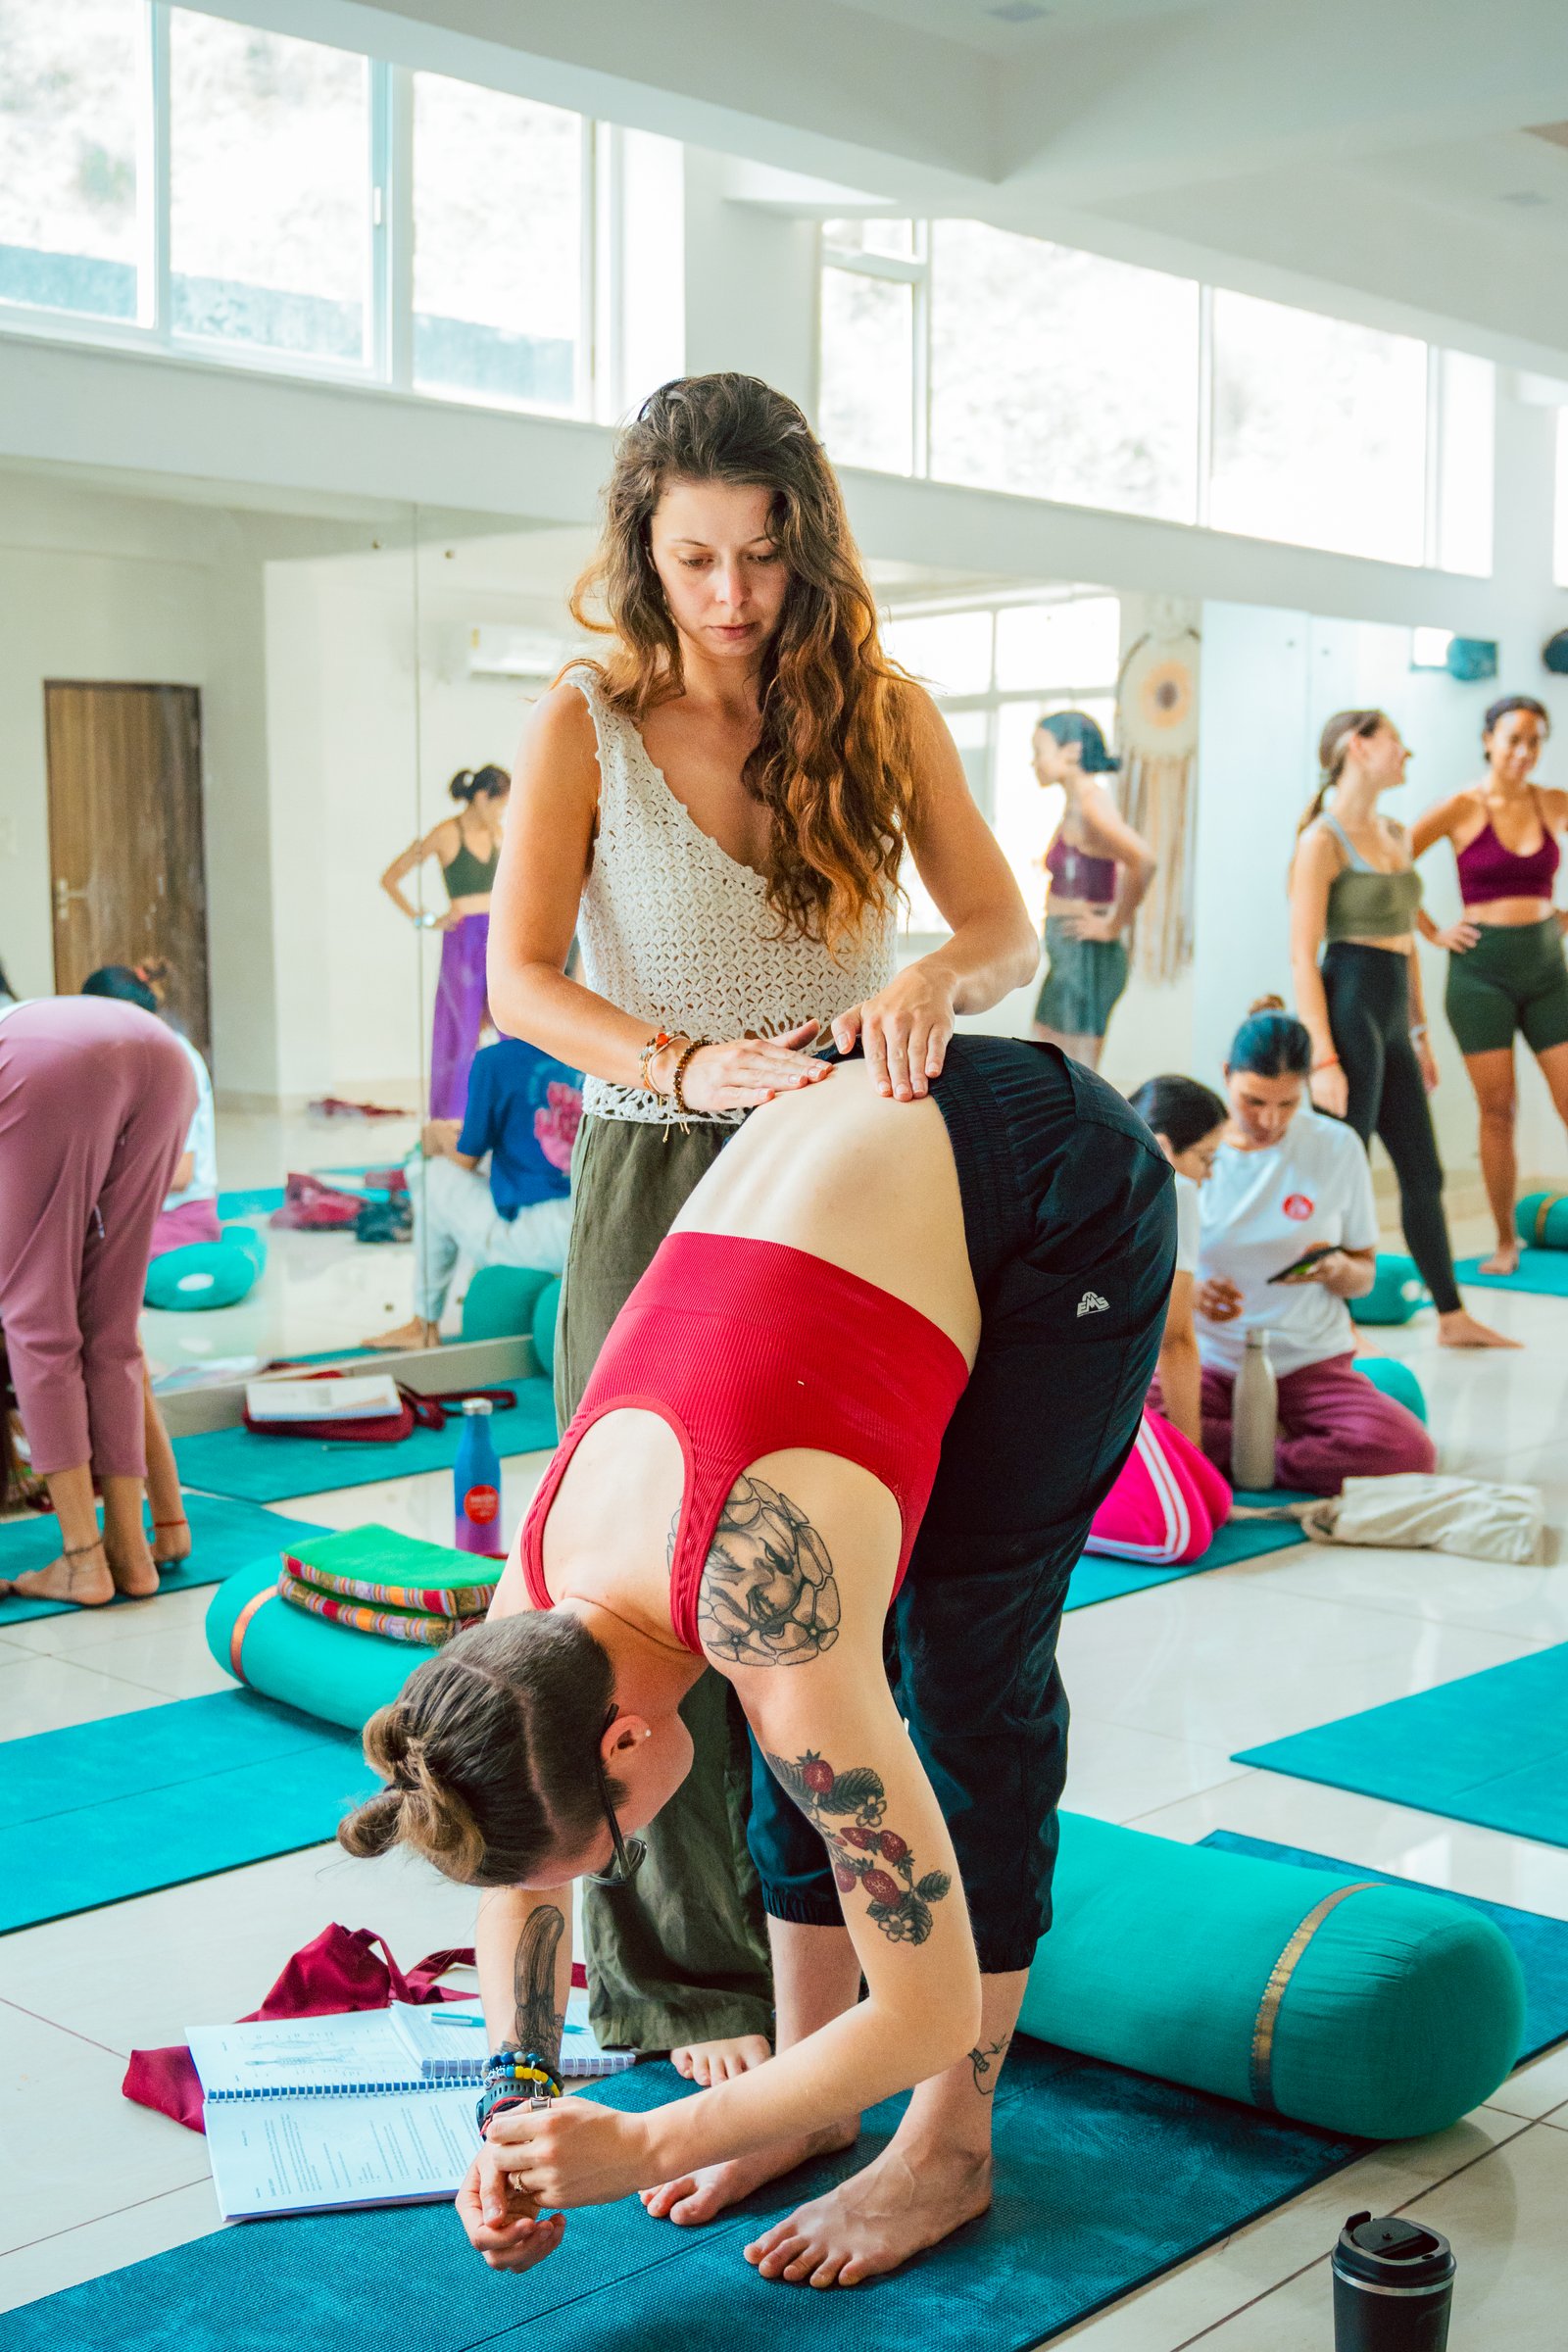
This can help: “Chest to thighs” instead of “head to knees”
Benefits:
- Stretches the back of the thighs and calves.
- Improves flexibility of the hips.
- Helps relieve tension in the neck and shoulders.
Beginner tip: Bend your knees as much as you need to.
Modification/Precaution: If your hands don't comfortably reach the floor, use blocks.
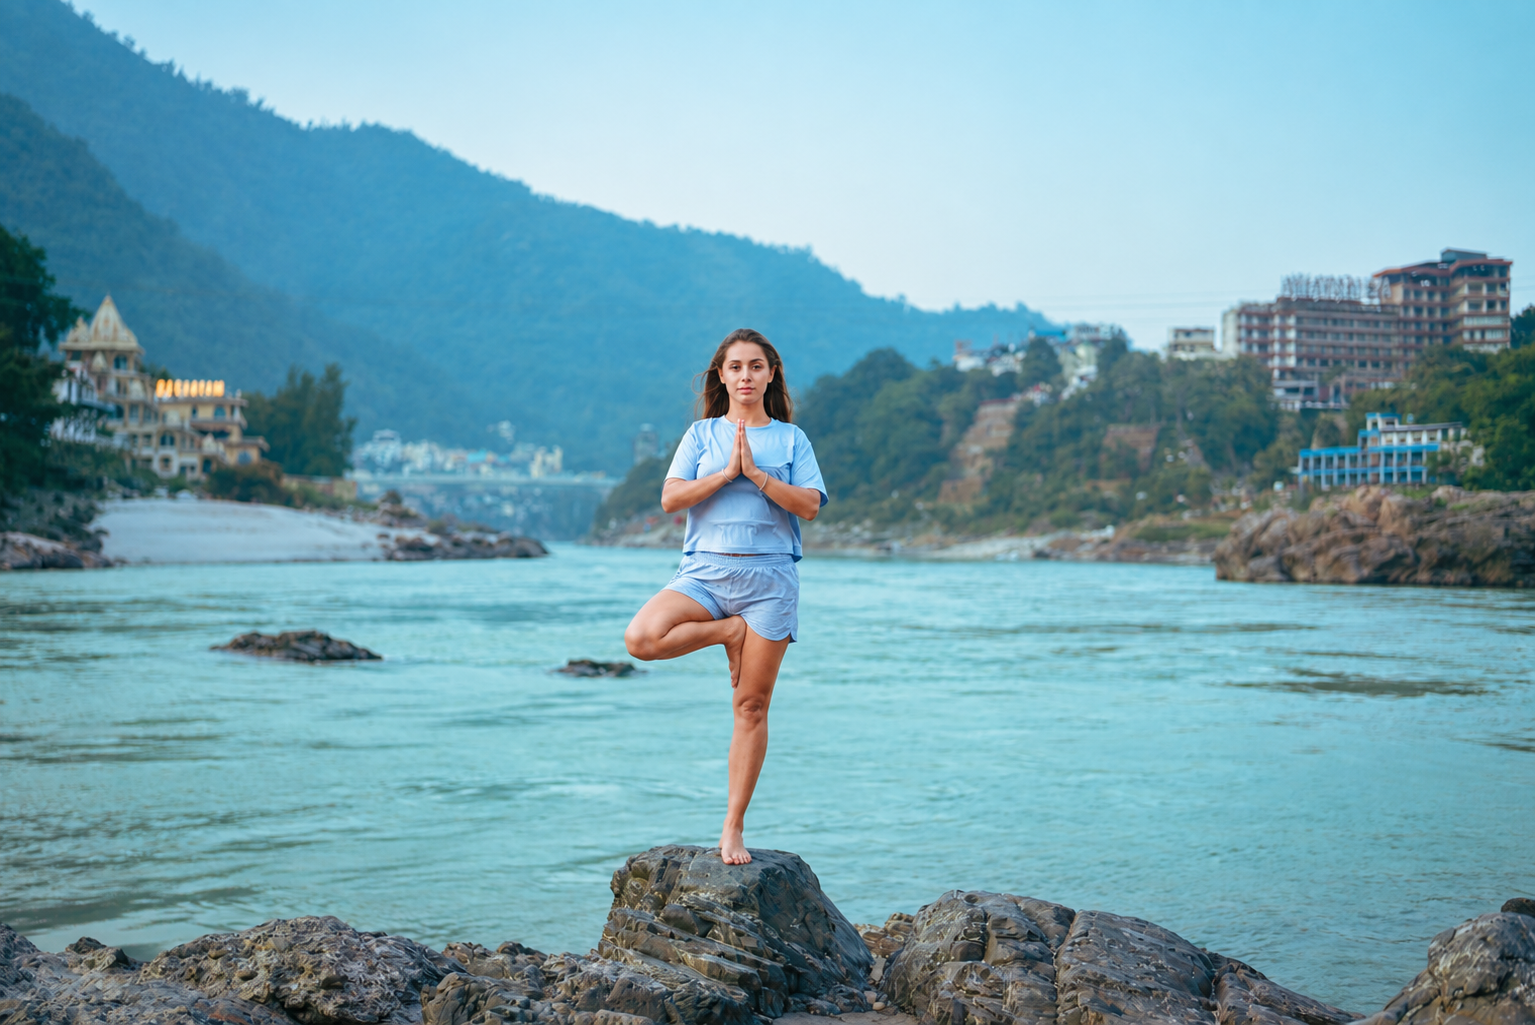
6. Tree Pose (Vrikshasana)
Stand tall and put your weight on your left foot. Bend your right knee and press the sole of your foot against your inner calf or thigh. Hold your hands in front of your chest.
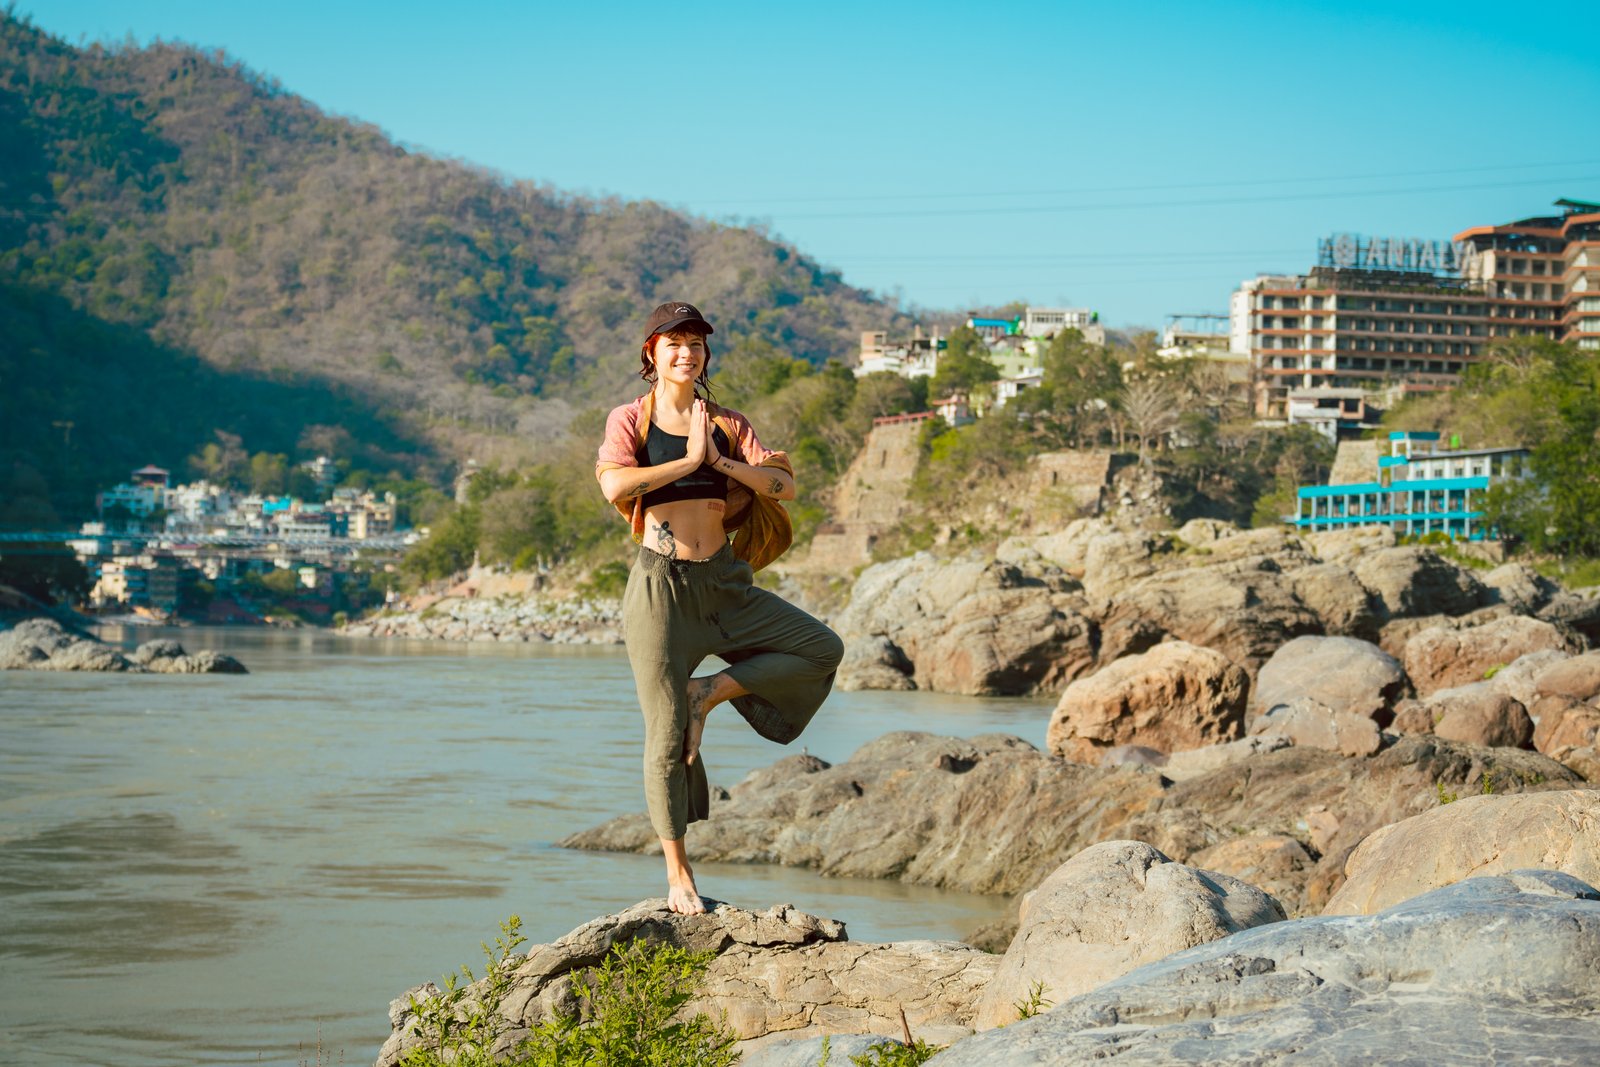
This can help: Focus your eyes on a point right in front of you. If you feel unsteady, reset and try again.
Benefits:
- Strengthens ankle and standing leg
- Enhances balance and stability.
- Develops concentration and body control.
Beginner tip: Place your raised foot on your calf instead of your thigh if needed.
Modification/Precaution: Do not place your foot directly on your knee.
7. Half Lotus Tree Pose (Ardha Padmasana Vrikshasana)
Start in Tree Pose and, if your hips are open enough, place your raised foot in Half Lotus position. Keep your standing leg strong, and keep your back straight.
This can help: Get towards your hips. Do not make the knee turn outward.
Benefits:
- Challenges balance more than a regular Tree Pose.
- Increases hip flexibility and mobility.
- Strengthens the standing leg and ankle.
Beginner tip: If you find Half Lotus challenging, start with regular Tree Pose.
Modification/Precaution: Do not ever force the foot into place or put strain on the knee.
8. Eagle Pose (Garudasana)
Bend your knees a little and transfer your weight to one leg. Cross the other thigh over it and if comfortable, wrap the foot behind the standing calf. Hold your palms together and cross your arms in front of you.
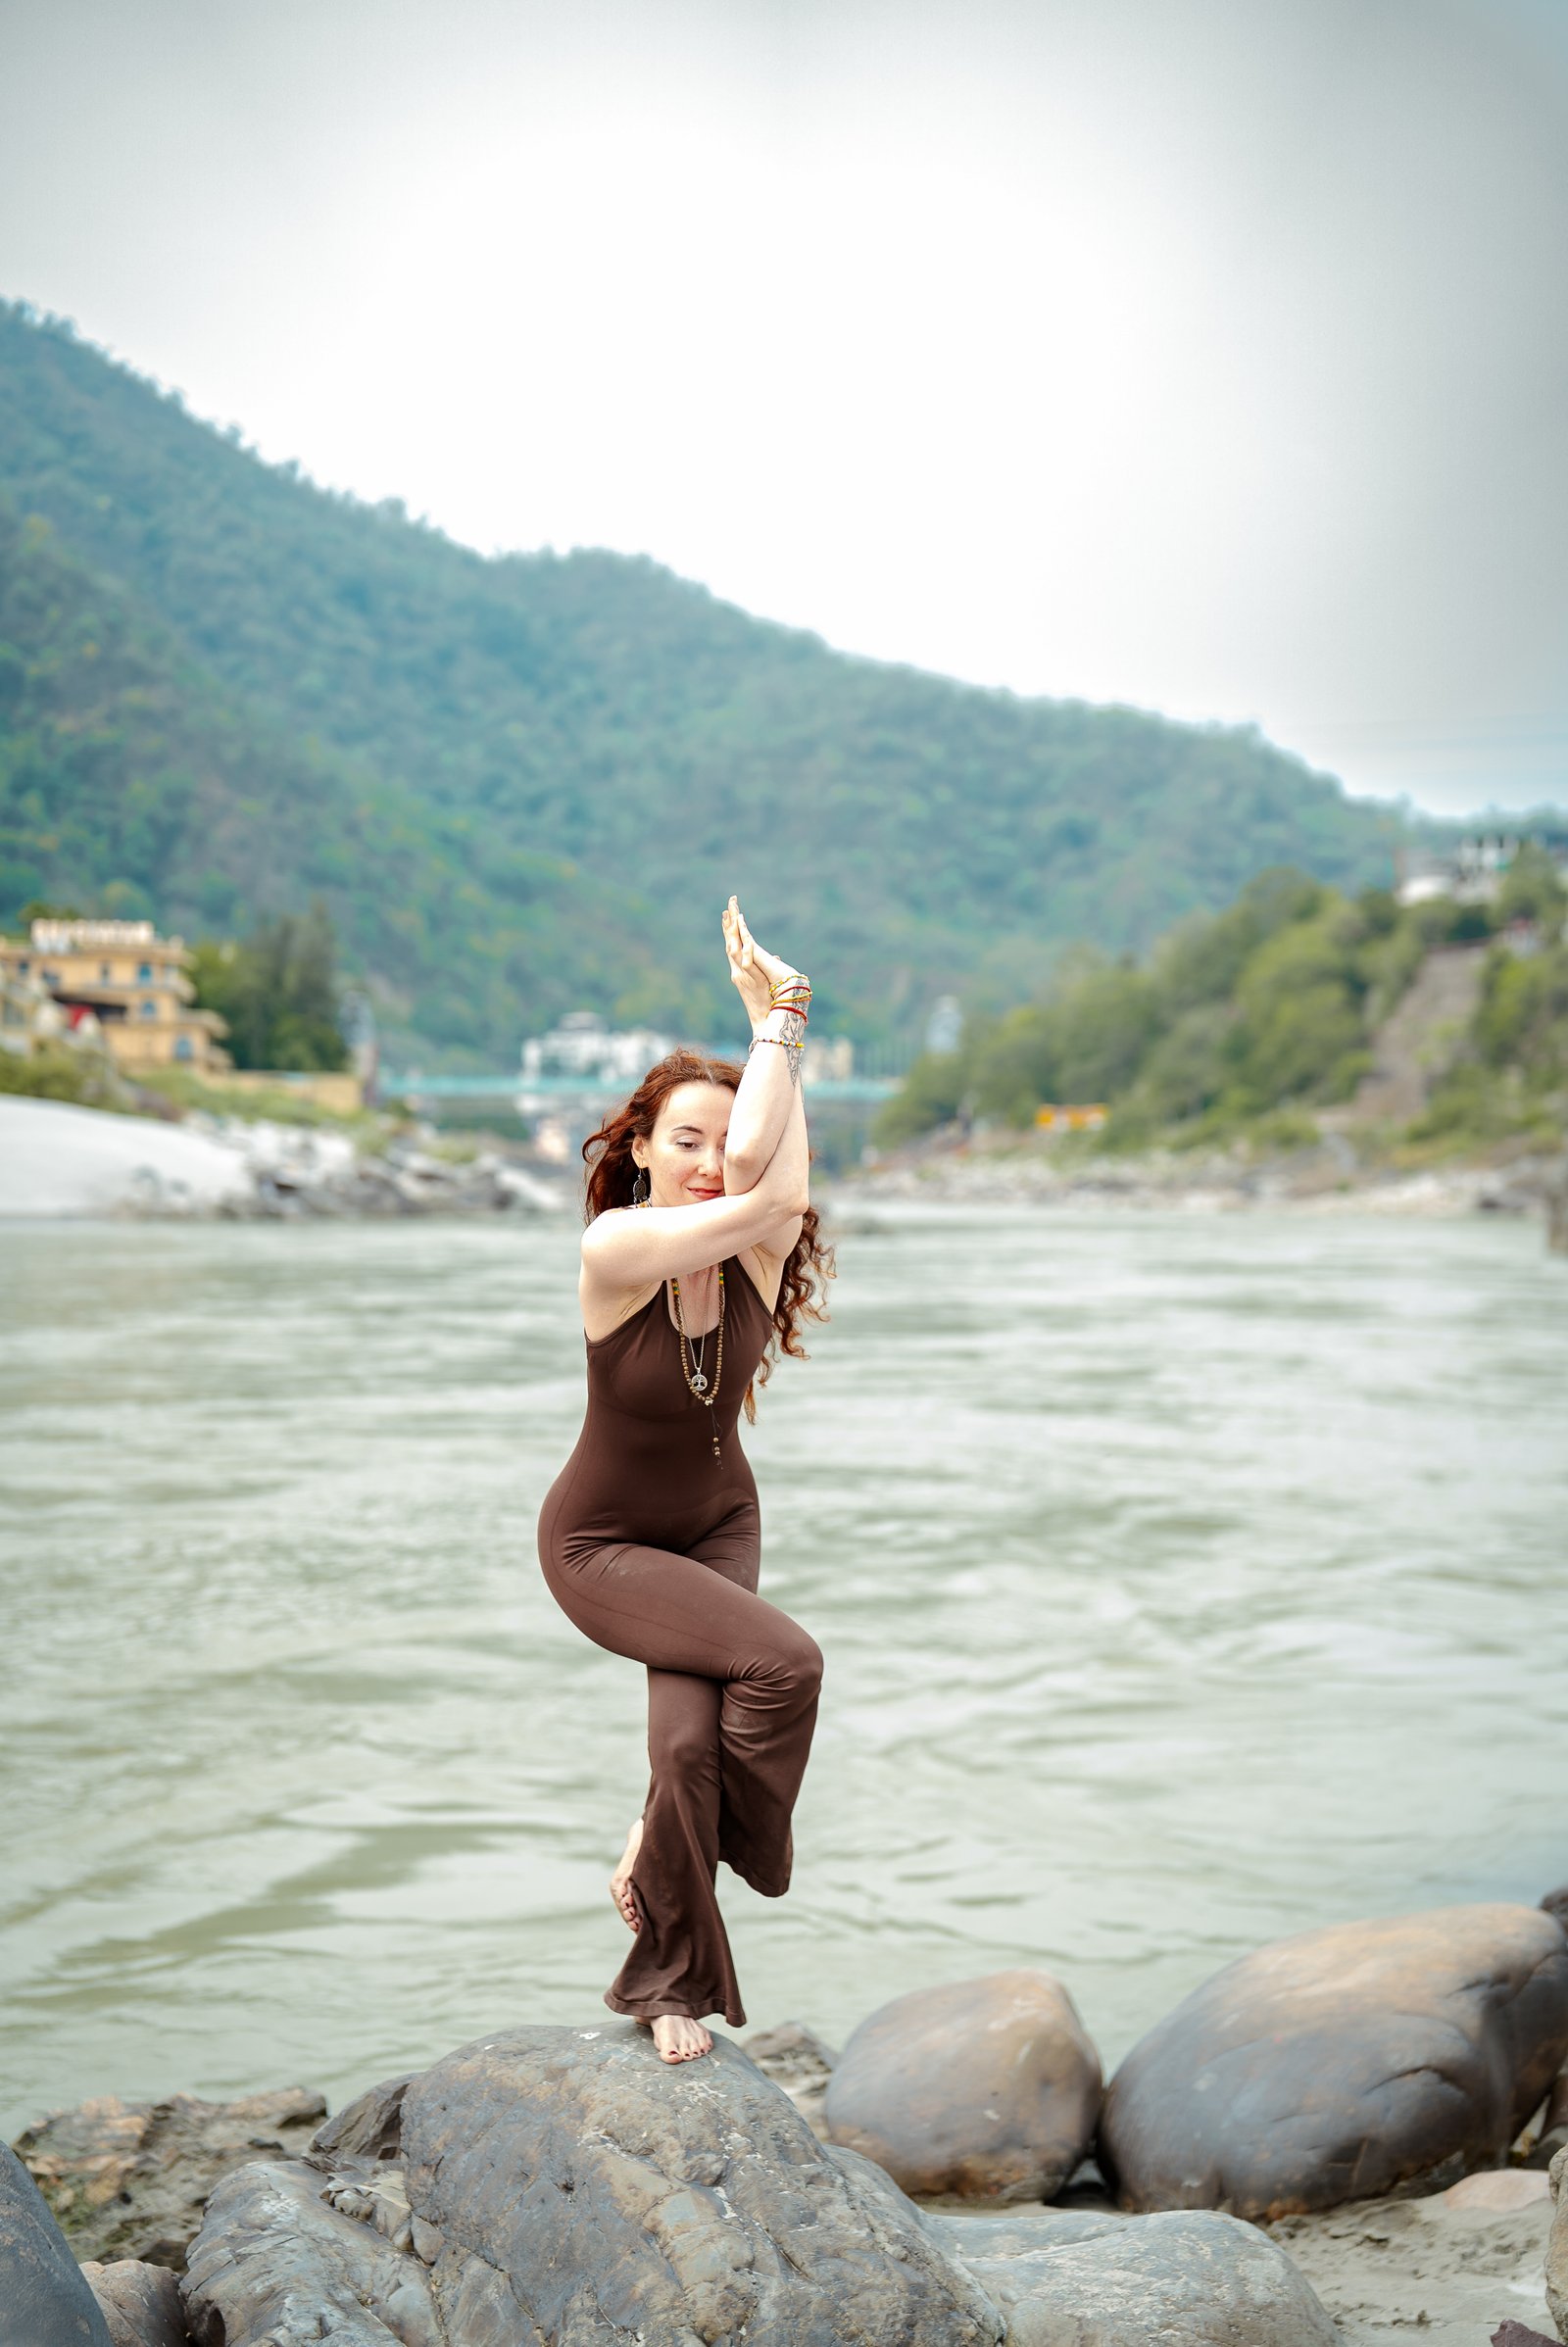
This can help: Keep your hips facing forward and your gaze steady.
Benefits:
- Strengthens legs and ankles.
- Enhances balance and coordination.
- Improves the range of motion of the shoulder and upper back.
Beginner tip: Don’t stress about getting the foot completely wrapped.
Modification/Precaution: If you find it difficult to balance, keep your stance wider.
9. Balancing Stick Pose (Tuladandasana)
Hold your body straight up and lift your arms over your head. Put your weight on one leg. Slowly lean your torso forward and extend the other leg backwards. Your body should be in a long line.
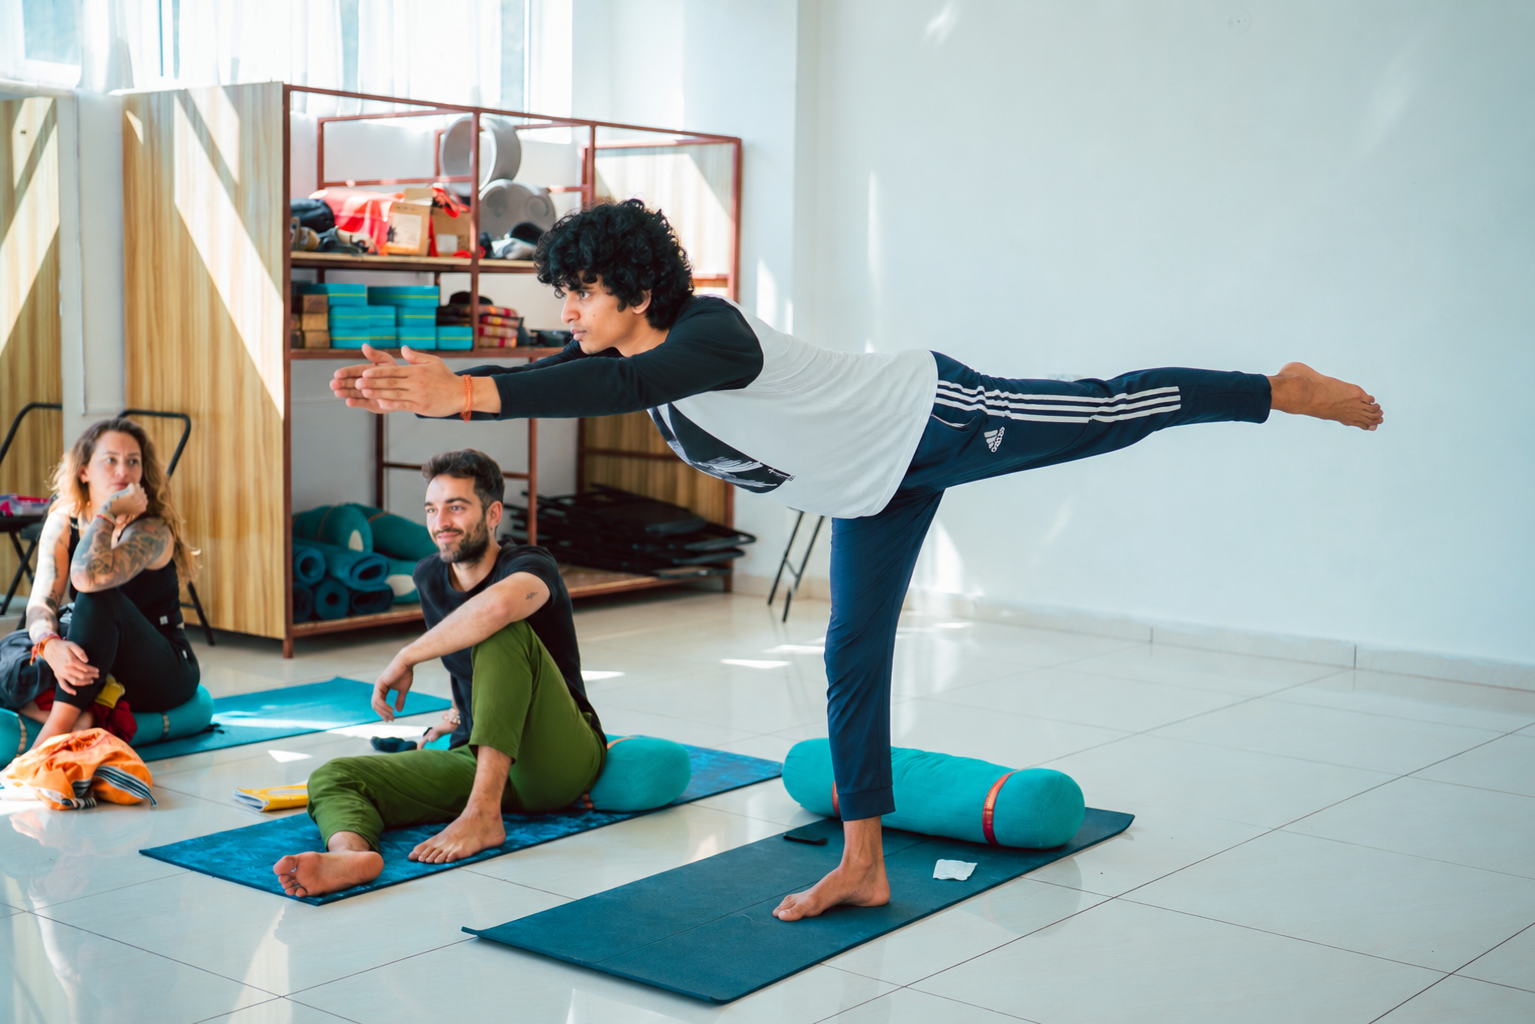
This can help: Reach forward with hands and back with heel, as if someone is pulling you gently from both ends.
Benefits:
- Strengthens the hip and standing leg.
- Works on the core and back.
- Improves balance, concentration and body control.
Beginner tip: Practice against a wall for more confidence.
Modification/Precaution: Move slowly and be controlled in your movement.
10. Warrior I (Virabhadrasana I)
Stand with your feet apart. Turn your front foot out and your back foot slightly in. Bend your front knee and lift both arms overhead.
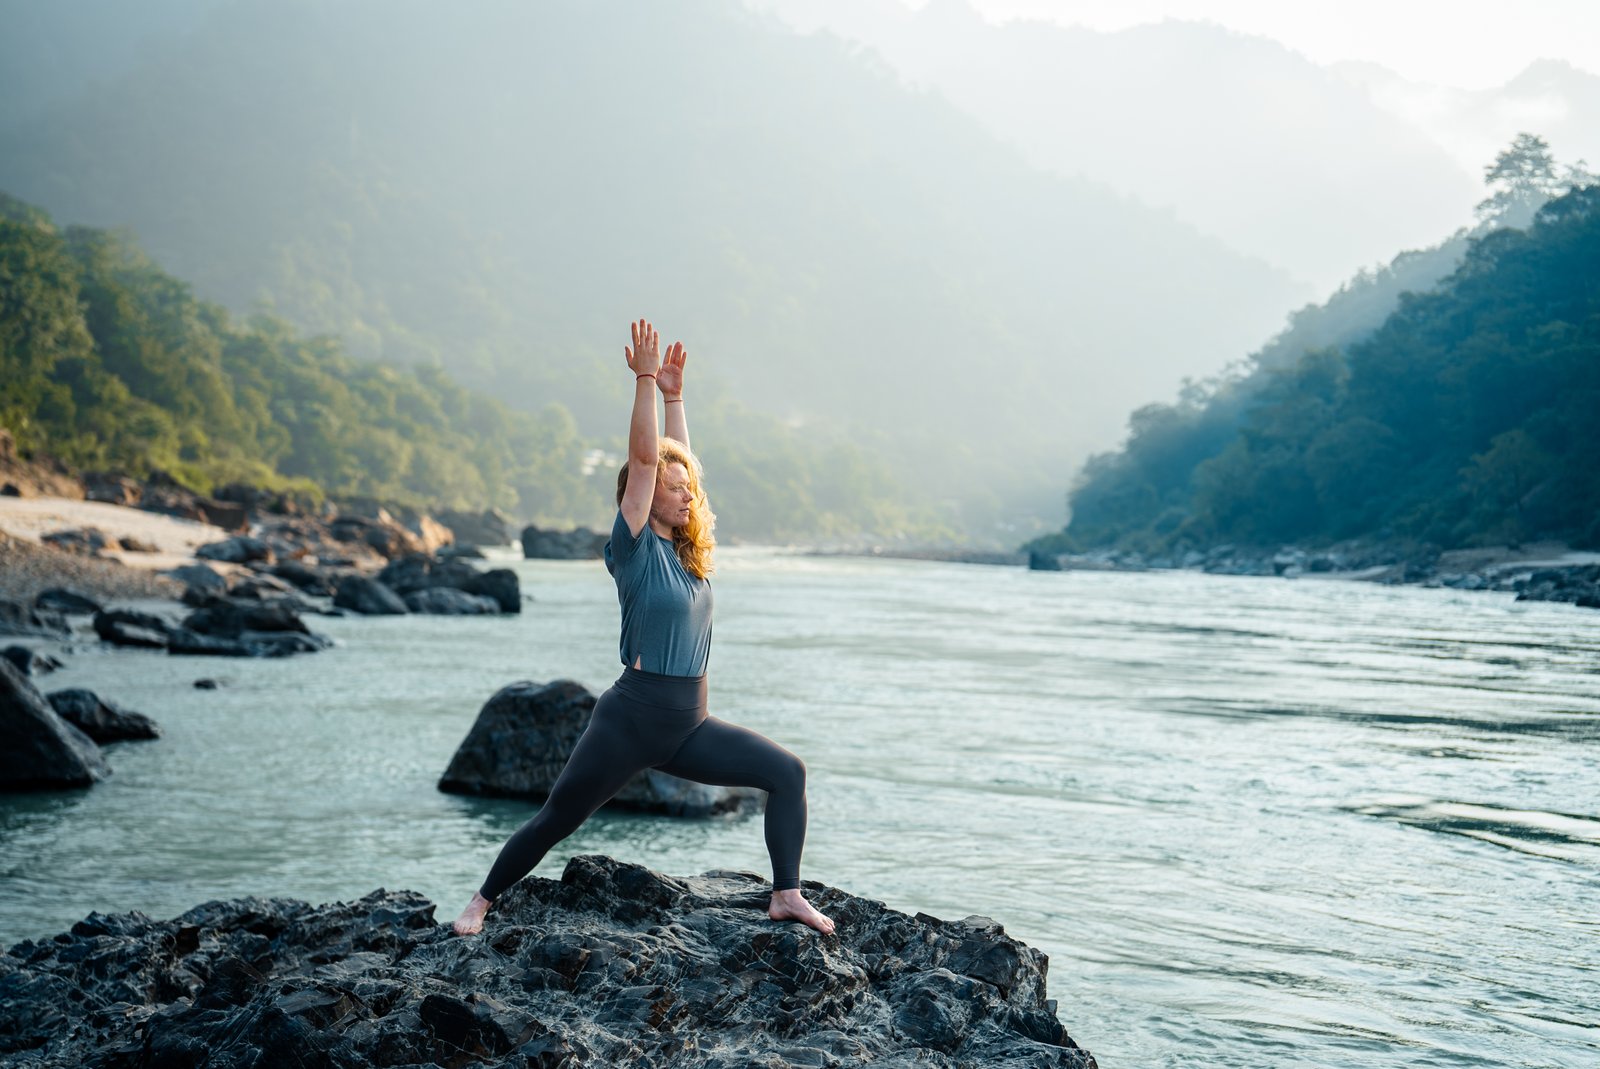
This can help: Make sure that your front knee continues to move toward your toes.
Benefits:
- Develops strong leg and hip muscles.
- Strengthens and improves stamina in the lower body.
- Opens the chest, shoulders and front of the hips.
Beginner tip: If you feel unsteady, shorten your stance.
Modification/Precaution: Keep front knee comfortable; don’t force a deep bend.
11. Warrior II (Virabhadrasana II)
From Warrior I, open your arms wide and twist your upper body to the side. Keep your front knee bent; keep your back leg straight.
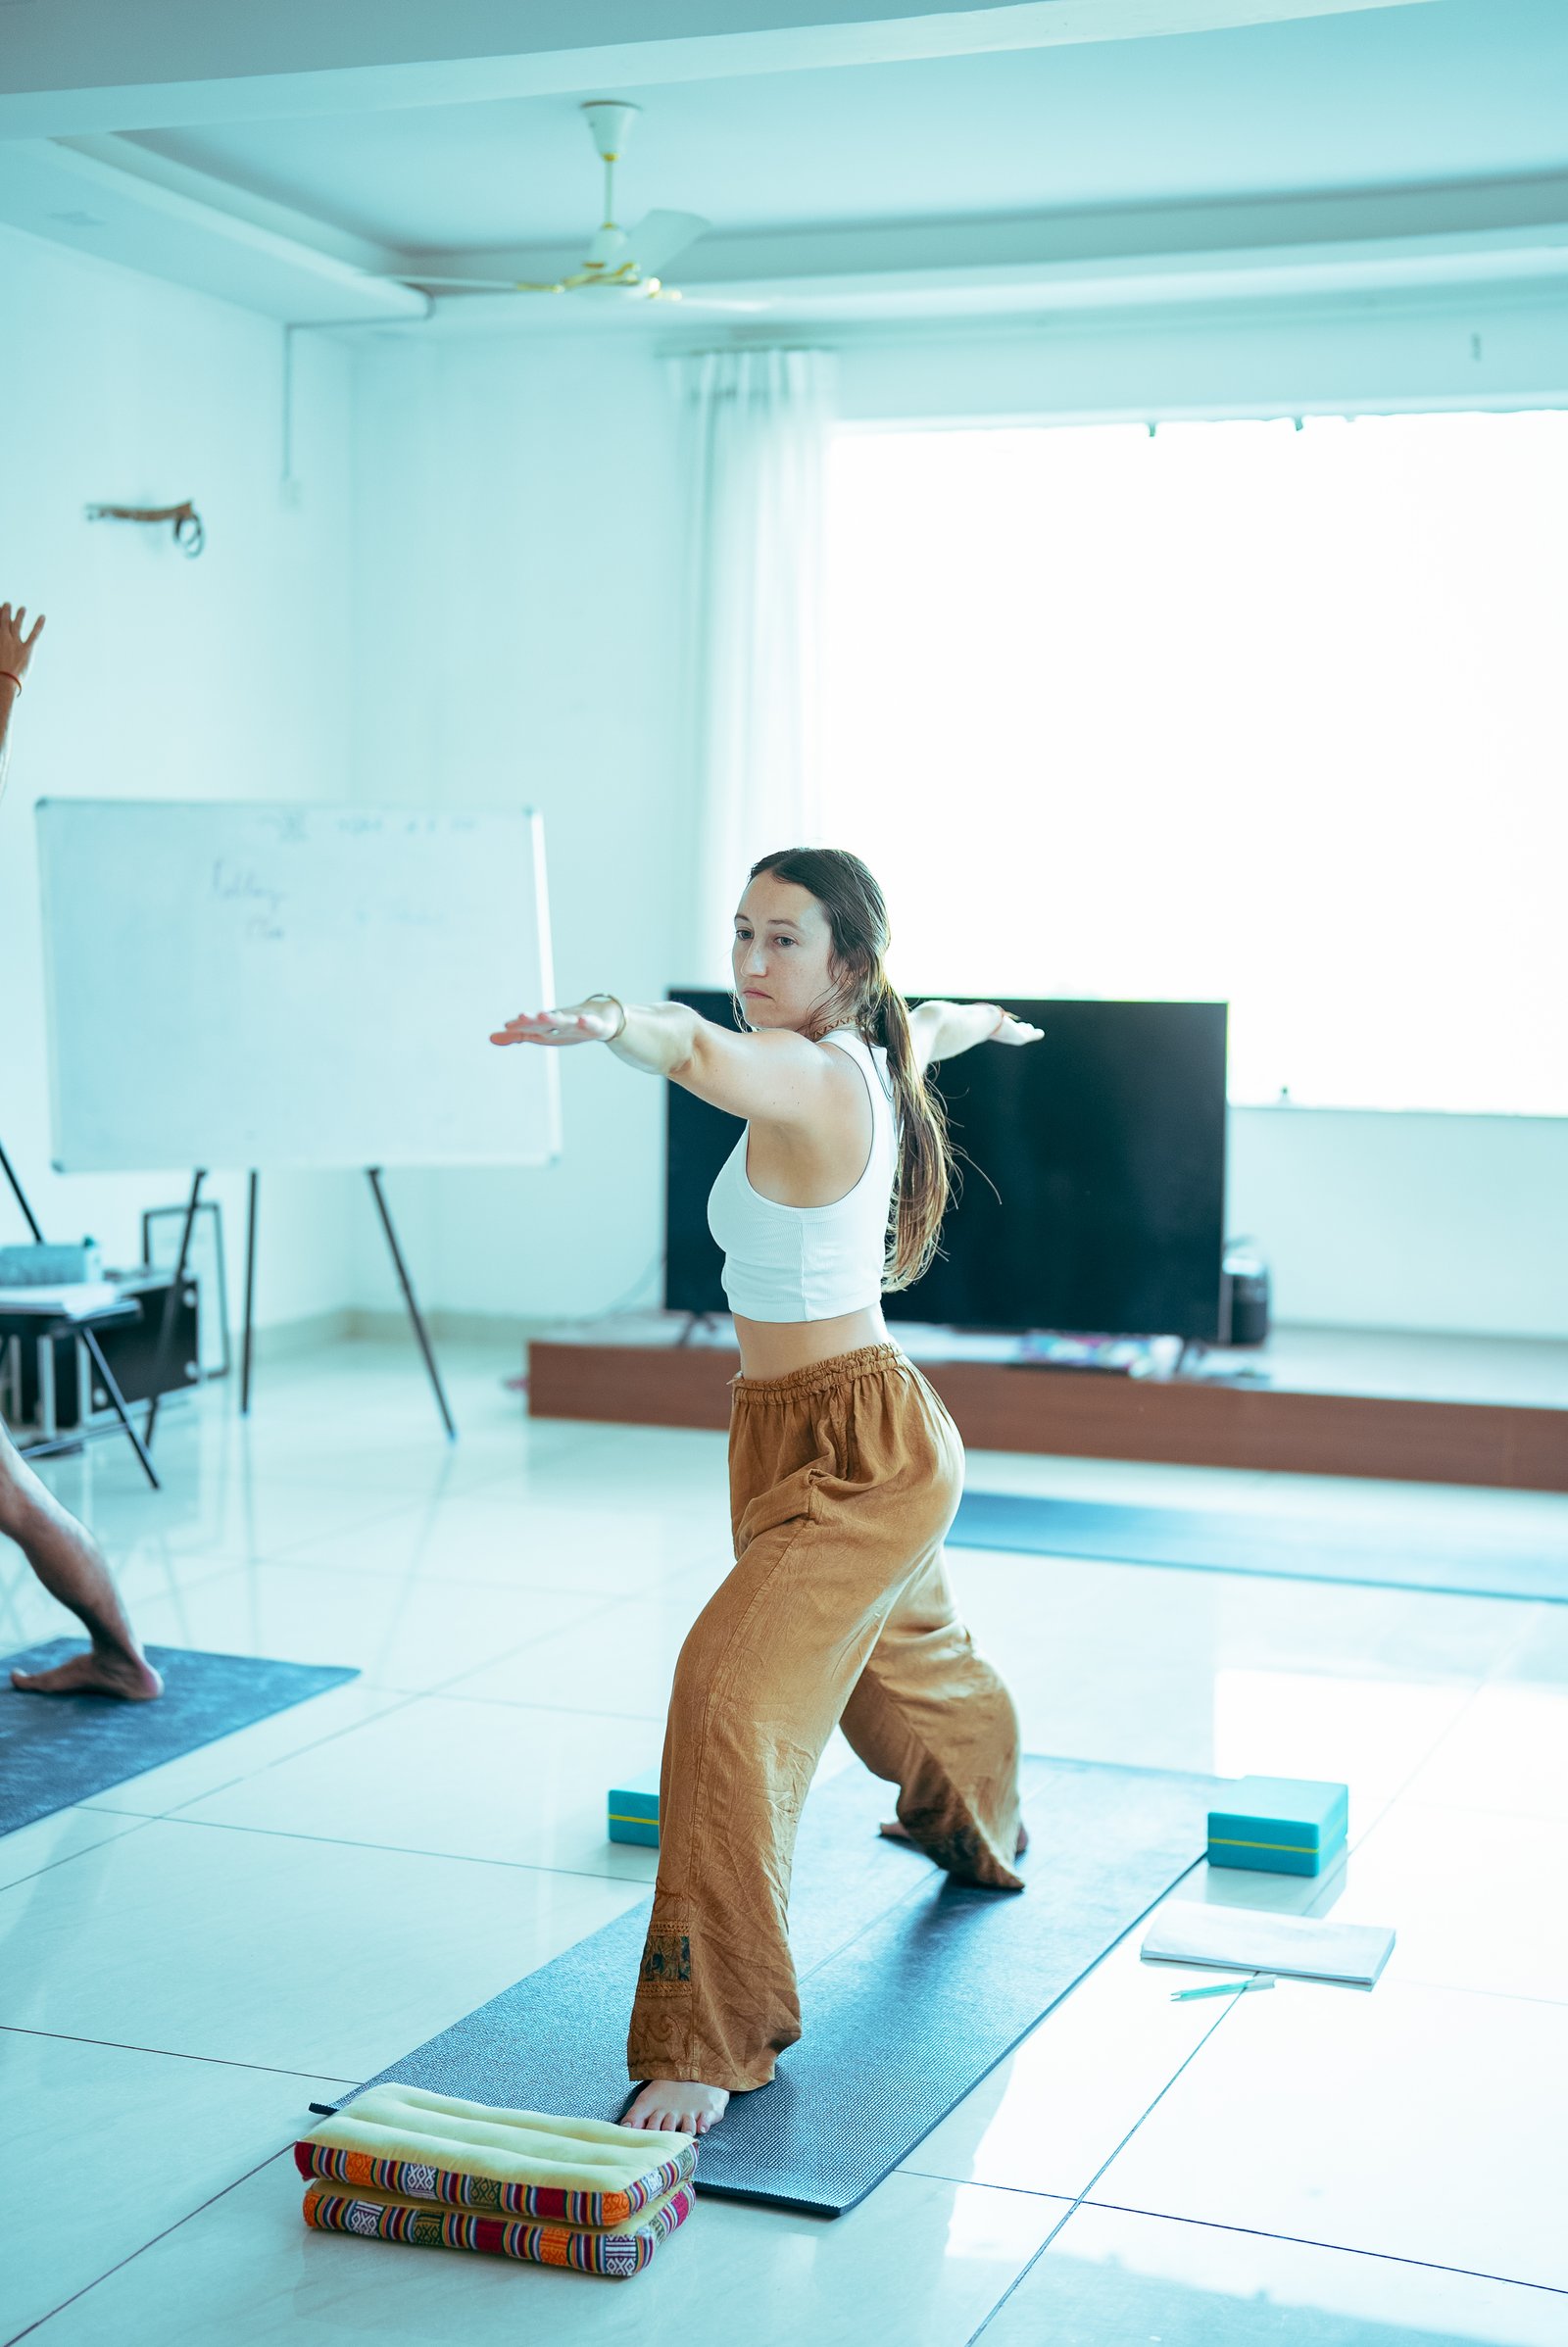
This can help: Stretch your arms out to the opposite walls and keep your feet centred on the floor.
Benefits:
- Strengthens the thighs, hips and legs.
- Builds lower body endurance.
- Improves hip flexibility and leg stability.
Beginner tip: Don’t worry if your front thigh is not parallel to the floor.
Modification/Precaution: If you feel any strain, reduce the depth of your front knee bend.
12. Half Moon Pose (Ardha Chandrasana)
Stand with your feet apart and place your right hand on the floor or a block. Shift your weight onto your right leg and slowly lift your left leg until it is roughly parallel to the floor. Open your chest and extend your left arm upward.
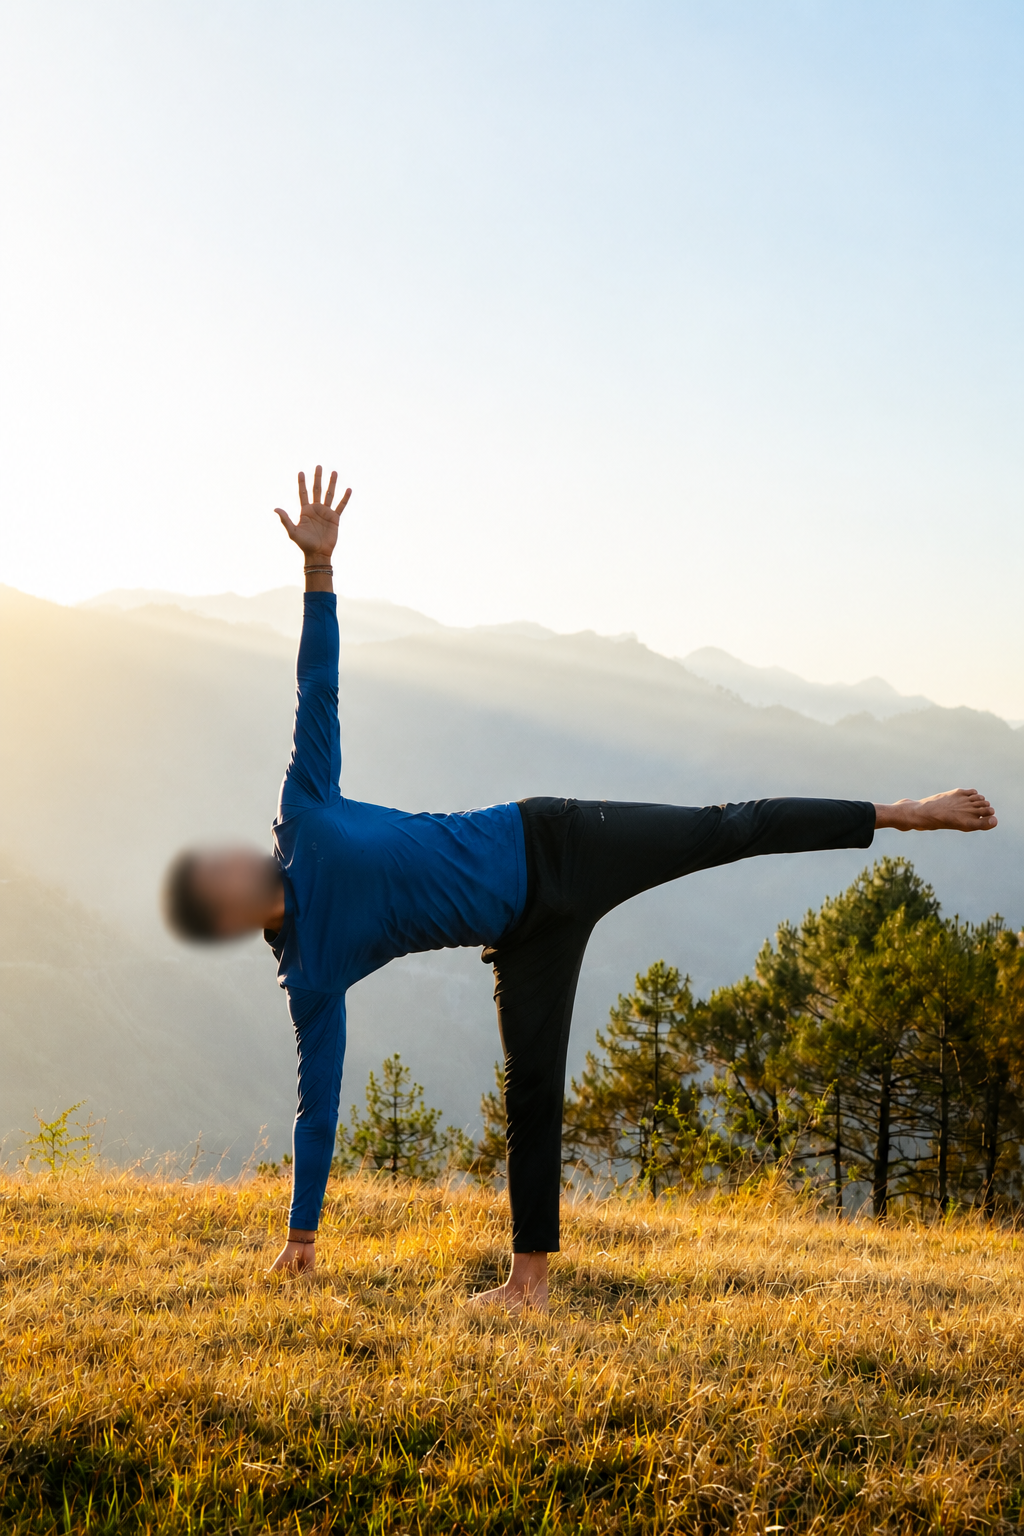
This can help: Rather than letting the lifted leg hang in the air, keep it active.
Benefits:
- Strengthens the ankle, hip and standing leg.
- Improves coordination and balance.
- Strengthens the core without losing balance.
Beginner tip: Until you’re feeling more confident, practice close to a wall.
Modification/Precaution: If lifting your leg higher impacts your balance, keep it lower.
13. Extended Side Angle Pose (Utthita Parsvakonasana)
Start in Warrior II. Rest your front forearm on your thigh or your hand on the floor beside your front foot. Reach your other arm overhead and lengthen it forward.
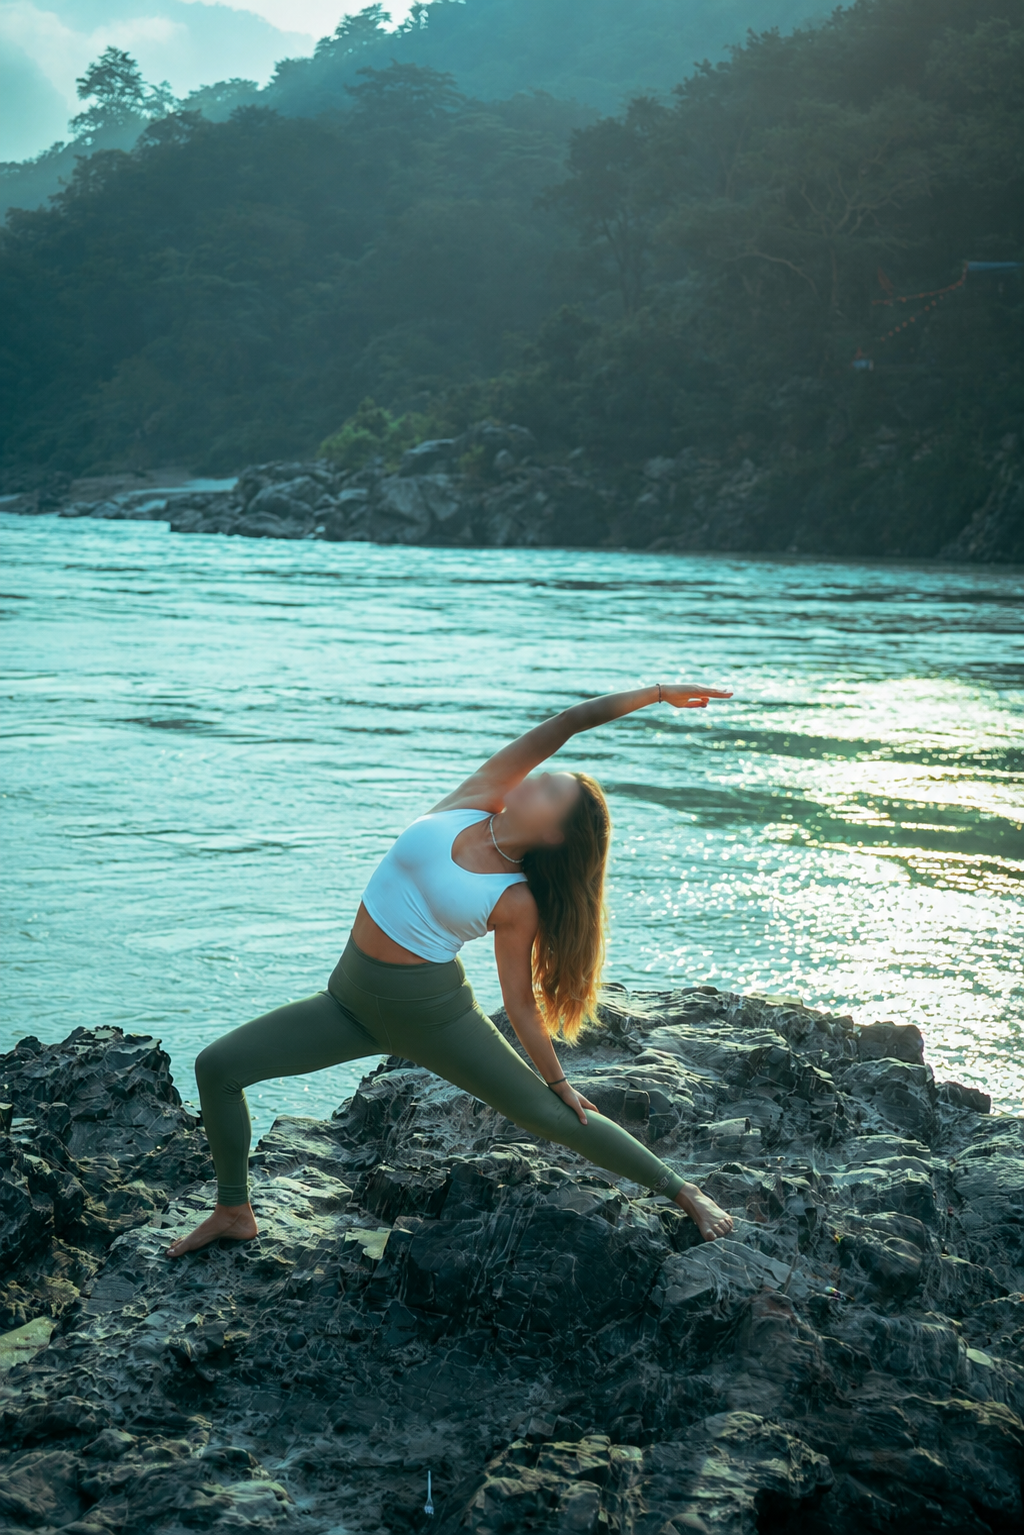
This can help: Keep your front knee strong and your whole side body long.
Benefits:
- Legs and hips are strengthened.
- Stretches the inner thigh and sides of the body.
- Increases mobility of the hips and shoulders.
Beginner tip: Rest your forearm on your thigh to make the pose easier to perform.
Modification/Precaution: Do not put your full weight into the lower hand.
14. Pyramid Pose (Parsvottanasana)
Step one foot forward and the other back, heels down, hips facing forward. Lengthen your spine, straighten your legs without locking your knees and fold forward from your hips.
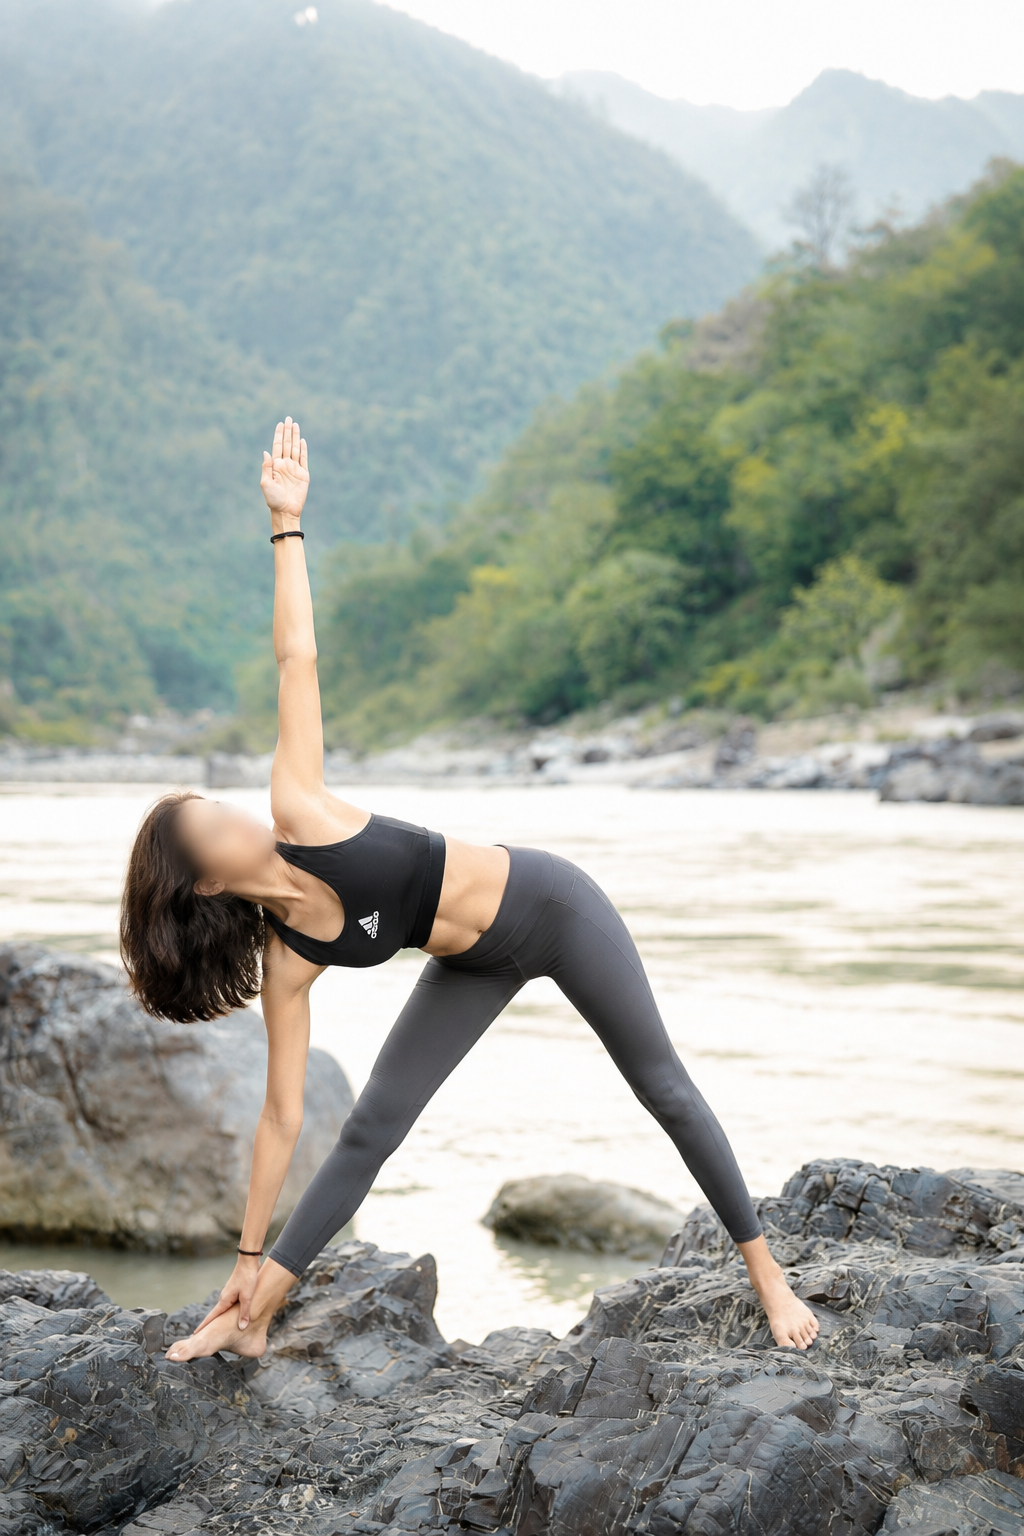
This can help: Lengthen your spine first, then go deeper into the fold.
Benefits:
- Stretches the hamstrings and the calves.
- Increases the flexibility of the hip.
- Builds leg strength and improves stability.
Pro tip: If your hips are tight, keep your stance a bit narrower.
Modification/Precaution: If you feel pulling behind the knees, don’t force the fold.
15. Chair Pose (Utkatasana)
Stand with your feet together or a little apart. Bend your knees and push your hips back as if you're sitting back into a chair. Raise your arms over your head and keep your chest up.
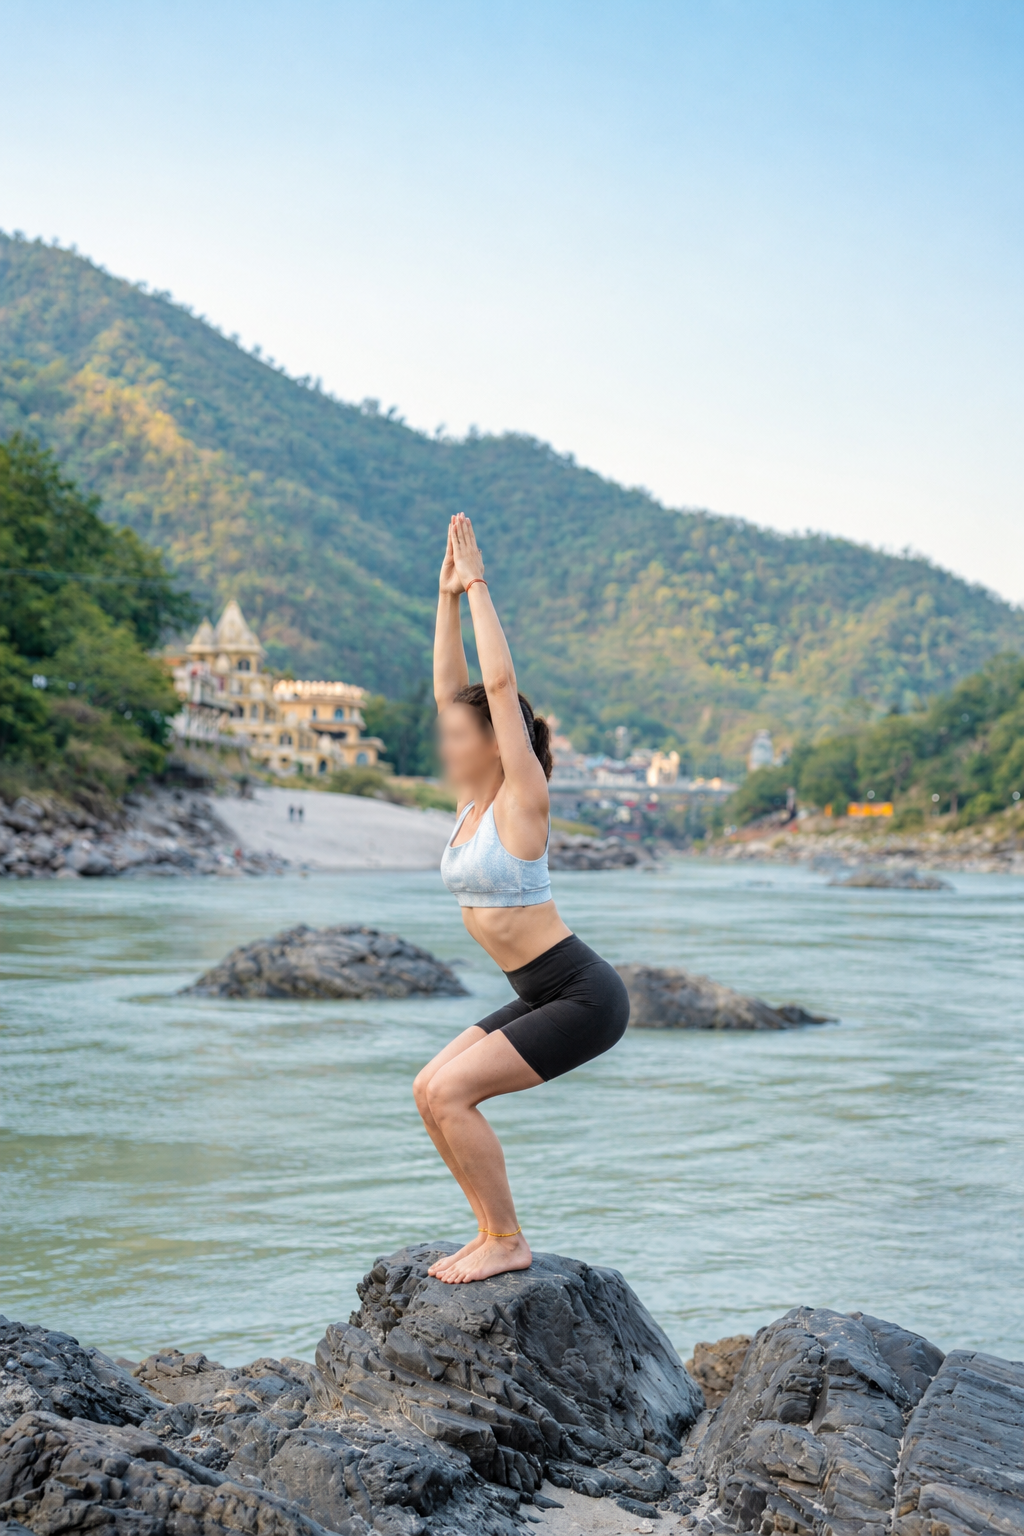
This can help: Push through the feet, keeping the knees aligned with the toes.
Benefits:
- Strengthens the thighs, hips and hamstrings.
- Strengthens the core.
- Enhances leg endurance and stability.
Beginner tip: Consider sitting back, not just bending your knees forward.
Modification/Precaution: If you feel discomfort in your knees, try a shallower squat.
Standing Yoga Asanas With Names
Knowing the names is nice, but knowing what to do with your body is better.
Mountain Pose is your foundation. Warrior I and II are about teaching you how to stand strong. Triangle and Pyramid provide length and control. Tree, Eagle and Half Moon invite you to find stability as your base becomes smaller.
Together, these Standing Yoga poses offer a simple map to explore different ways of standing, bending, opening and balancing.
You don't need to learn all 15 in a single day. Pick a few, repeat them over and over and get your body used to them.
Standing Yoga Poses for Beginners
For those new to yoga, start with poses where you can focus on your alignment instead of worrying about getting the “perfect” shape.
Mountain Pose, Warrior I, Warrior II, Triangle Pose and Standing Forward Bend are good starting points.
Take it easy. Watch your feet. Look closely at your knees. Just keep breathing.
5 Standing Asanas for Beginners
Want a short routine? Begin with these 5 Standing Asanas:
- Mountain Pose – Establish your standing base.
- Warrior I – Establish a solid, grounded position.
- Warrior II – Focus on stability and leg alignment.
- Triangle Pose – Extend and shift side body.
- Tree Pose – Bring Balance.
Hold each pose for a few comfortable breaths, then repeat on both sides where applicable.
Two Standing Asanas to Practice Every Day
If you have a few minutes, come back to Mountain Pose and Warrior II.
Mountain Pose teaches you how to stand consciously. Warrior II asks you to have that awareness as your legs work harder.
These Two Standing Asanas are simple, but they don’t have to be boring. Every time you repeat them, notice something new: your foot pressure, your breathing, your knee position, the way your shoulders relax.
Benefits of Standing Yoga Asanas
Standing poses develop a unity in your body. Your feet keep you grounded, your legs support you, your core supports you, your spine helps organise the posture.
The added challenge of balancing poses requires your attention. You start to notice small changes that you would usually ignore.
Think less about what a pose “gives” you, and more about what it teaches you. That awareness is where much of the value of Standing Yoga poses starts to reflect.
How to Practice Yoga Asanas in Standing Position
Start with some light movements before moving into deeper poses.
One simple sequence could be:
Mountain Pose → Upward Bound Pose → Warrior I → Warrior II → Triangle Pose → Tree Pose → Standing Forward Bend
First, take time to set your feet before you adjust your upper body. Never push a stretch and keep your breath even.
Use a block if the floor seems too far away. If you feel you are losing your balance, lean against a wall. Props don’t make a pose less effective. They help you learn it right.
Whether you're new to yoga or you're deepening a regular practice, Yoga Asanas in Standing Position provide a practical way to explore alignment, stability and mindful movement.
Common Mistakes While Practising Standing Yoga Poses
Some little habits can change the entire posture. Don’t lock your knees, allow your front knee to roll in, round your spine in forward bends, hold your breath, or push too hard.
No need to hurry into more complex variations of pose.
This is something to keep in mind even after you stop calling yourself a beginner. A difficult pose on a weak foundation rarely becomes a better pose by going deeper.
And remember: Wobbling in a balance pose is not a failure. Your body is learning.
Make More Room for Movement in Your Day
A chair can easily become the default place for just about everything we do. But your body requires more than sitting, and you don’t have to wait for a major lifestyle change to give it that.
Start by swapping out a few minutes of sitting for a standing practice. Begin with Tadasana, move through a Warrior II or Triangle Pose, and finish with a balancing asana such as Tree Pose. Even a little movement will change the flow of your day.
The more you practise, the more obvious this becomes: learning standing yoga poses is only the beginning. Learning becomes interesting when you understand why you do it, how to modify it and how it affects different bodies.
There is, of course, more to yoga than learning individual postures; the 200-Hour Hatha Ashtanga Vinyasa Yoga Teacher Training at Nirvana Yoga School will help you explore asana practice along with alignment, anatomy, pranayama, meditation, philosophy and teaching methodology.